Alli User Guide - iOS SDK Integration for Storyboard UI
Integrate Alli in your iOS mobile apps. #apple

The first thing you need to do is adding the SDK in your project.
This user guide explains how to integrate Alli iOS SDK for Storyboard UI. Alli SDK requires iOS 10 or above.
Step 1. Download and unzip the SDK
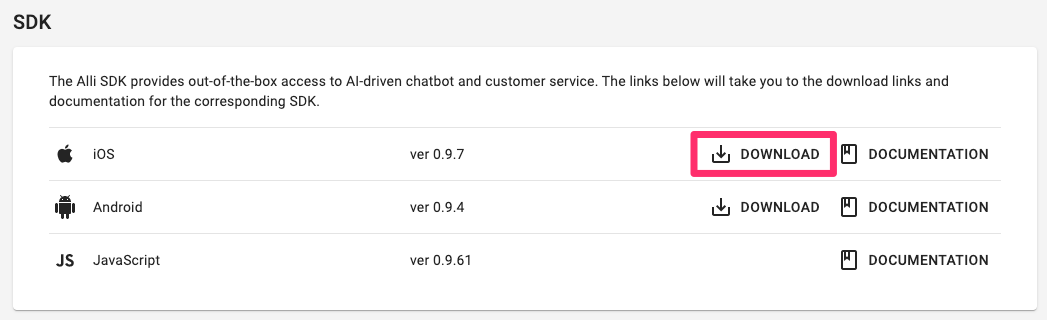
- Login to Alli dashboard and proceed to the Settings menu. Scroll down to find iOS SDK download and download the SDK.
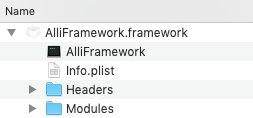
- After unzipping the SDK, you should see the following files in the folder:
Step 2. Add SDK to your project
- Right click the Project Icon in your Project Navigator in Xcode.
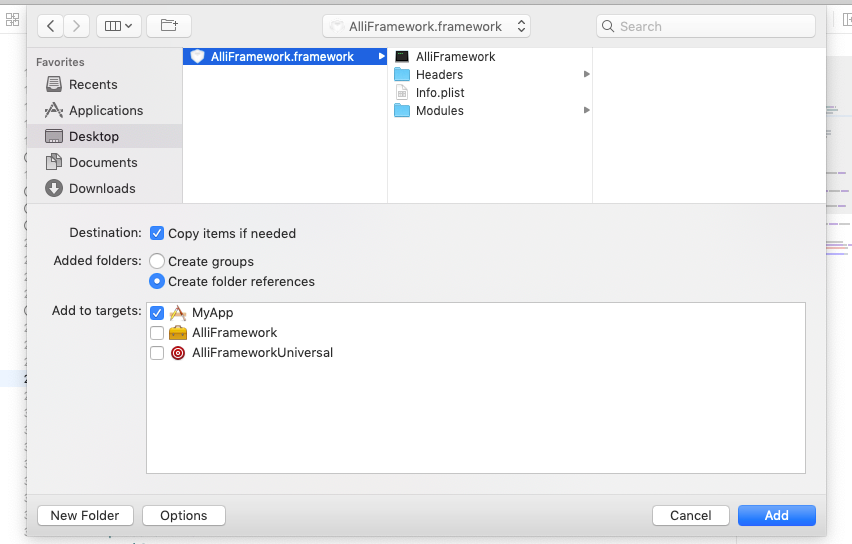
- Click the Add Files to "Your App"... button. A dialog will appear.
- Select the AlliFramework folder.
- Check 'Copy items if needed' if it's not checked.
- Make sure your dialog looks like the following, then click the Add button
Step 3. Add embedded binaries, frameworks & libraries
- Click on your Project Icon in the Project Navigator.
- Go to General > 'Frameworks, Libraries, and Embedded Content' and set AlliFramework.framework to 'Embeded Without Signing'.
- Check Build Phases > 'Link Binary With Libraries' and 'Embed Frameworks'. and make sure AlliFramwork.framework is added.

Steps 4. Specify permission in Info.plist
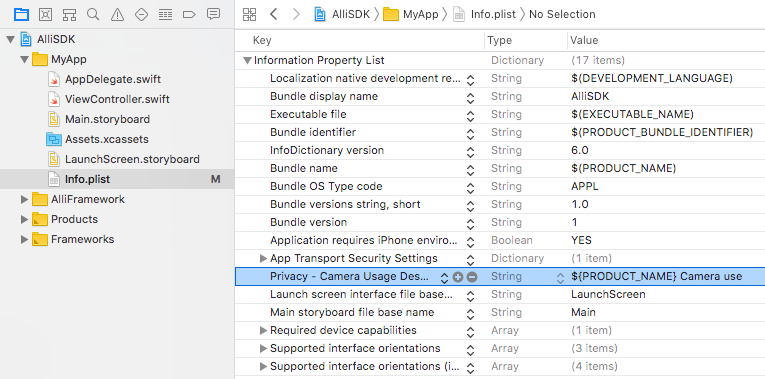
Open info.plist file in the AlliFramework.framework folder and click the “+” symbol next to Information Property list. Scroll through the dropdown list to the Privacy options and select Privacy Camera Usage Description for accessing camera or Privacy Photo Library Usage Description for accessing the Photo Library. This will permit users to upload receipt files or product images into chat.
Fill in the String value on the right after you've made your selection to include the text you would like displayed to your user when the alert pop up asks for permissions.
Step 5. Initialize Alli SDK
- Add
import AlliFrameworkto the beginning of your application’s delegate class file ViewController.swift. This will make the Alli framework accessible to your project. - Initialize the Alli library with your API Key by adding the following in your ViewController.
  var alli: Alli?
  override func viewDidLoad() {
    // showHeader - optional, default: true, If you want to remove the header, turn off this option.
    // showFooter - optional, default: true, If you want to remove the footer, turn off this option.
    // showBackButton - optional, default: true, If you want to remove the back button on the header, turn off this option.
    alli = Alli("YOUR_API_Key", eventHandler: self, showHeader: true, showFooter: true, showBackButton: false)
  }
Update on June 2021
Now you can use all the available parameters in the Javascrip SDK for the Android SDK .
Use Dictionary<String, Any> type to send the parameters used in initializing Javascript SDK to initWithParams argument.
alli = Alli.initWithParams("YOUR_API_Key", eventHandler: self,
                           params: [
                               "header": true,
                               "footer": true,
                               "backButton": true,
                               "styleOptions": ["conversationContainer": [
                                   "right": 50,
                                   "left": 50,
                                   "bottom": 50]]])
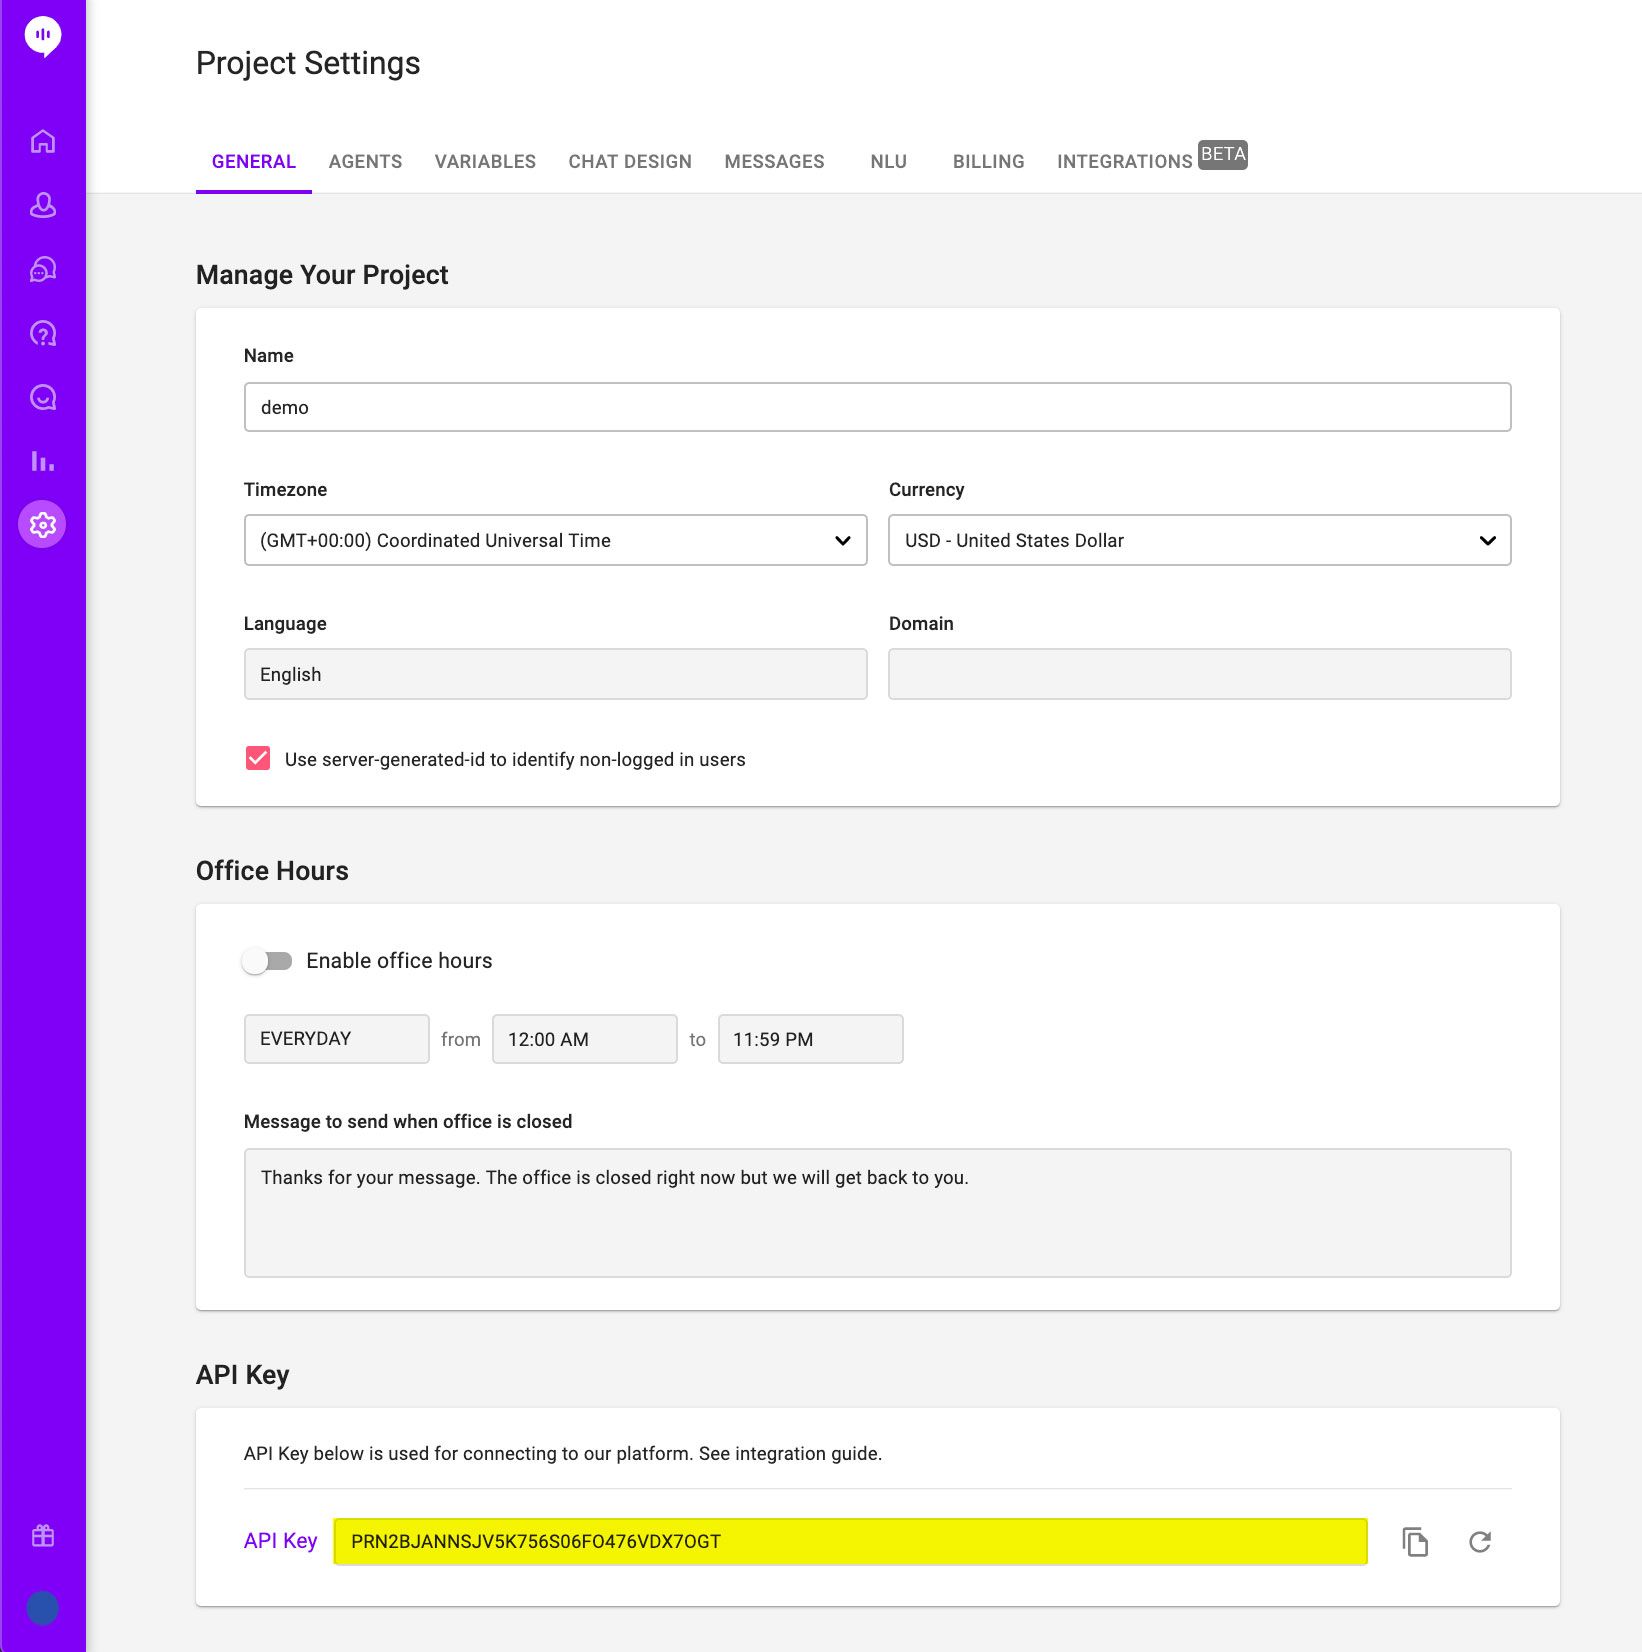
You can find your API Key by selecting “Settings” (gear icon) from the left navigation:
Step 6. Create chat window
To create the chat window and start a conversation with your customer, make the following call:
alli!.event(view: parentView)If you want to specify the user ID and the Placement, you can use the following format.
alli!.event(userId:"YOUR_userId", placement:"YOUR_placement", view:parentView)For users logged into your app and you know who they are, you can tell Alli who they are using the user id. You can also set a temporary id for users who are not logged in.
Placement is a place and point in time in your app where you might want to display a skill flow to your users. Once you have created a Placement, you can change the skill flow at that Placement with the Alli Dashboard. You can think of an Alli Placement as a billboard, and an Alli skill as what gets shown on that billboard. The power of the Placement system is that you can decide what campaign to show at a placement whenever you like.
You should implement the Alli chat window in the parent view controller and assign the parent view controller as the delegate property. It is vitally important that the ViewController passed to this call be the top-most view and that it be unobstructed by other views. Parent view should have a minimum height and width.
Update on June 2021
Same as the initWithParams function, eventWithParams is added to use all the available Javascript parameters.
alli!.eventWithParams(view: innerView,
                      params: [
                          "user": ["id": "YOUR_userId"],
                          "placement": "YOUR_placement",
                          "variables": ["test": "test value",
                                        "AGE": 31,
                                        "BIRTHDAY": "2021-06-30",
                                        "boolean": true]])
※ Please mind the format of the userId above.
Step 7: Delegate methods to handle Alli events
The following delegate methods will provide feedback on the chat conversation status:
import WebKit

public protocol AlliEventHandler {
    // Called when initialized successfully.
    // You may receive NOT_INITIALIZE_YET error if
    // called before this event.
    func onInitialized(_ view:WKWebView!)

    // Called when chat started successfully.
    func onConversationStarted(_ view: WKWebView!, userId: String, placement: String, context: Any?)

    // Called when conversation did not start
    // even when Alli.event was called.
    func onConversationNotStarted(_ view: WKWebView!, userId: String, placement: String, context: Any?)

    // Called when user has closed the chat
    // window or Alli.close() is called.
    func onConversationStopped(_ view: WKWebView!, userId: String, placement: String, context: Any?)

    func onError(_ view: WKWebView!, errorCode: AlliErrorCode, userId:String?, placement:String?, context:Any?)
  }
Step 8: Link to other Apps
Link to http or https in Alli chatting will launch the customer's default browser. If you want to add links to other applications, implement handleUrlLoading method from AlliEventHandler.
  func handleUrlLoading(_ webView: WKWebView, decidePolicyFor navigationAction: WKNavigationAction, decisionHandler: @escaping (WKNavigationActionPolicy) -> Void) {
    let strUrl = navigationAction.request.url!.absoluteString
    if(<condition>) {
        UIApplication.shared.open(URL(string: strUrl)!, options: [:], completionHandler: nil)
        decisionHandler(.allow)
    }
    else {
        decisionHandler(.cancel)
    }
}
For example, if you want to launch the Apple Map,
let strUrl = "http://maps.apple.com/?q=seoul"Learn More About Allganize's Technology