Alli User Guide - Settings > Chat Design
Customize the design of your chatbot to fit your brand image.
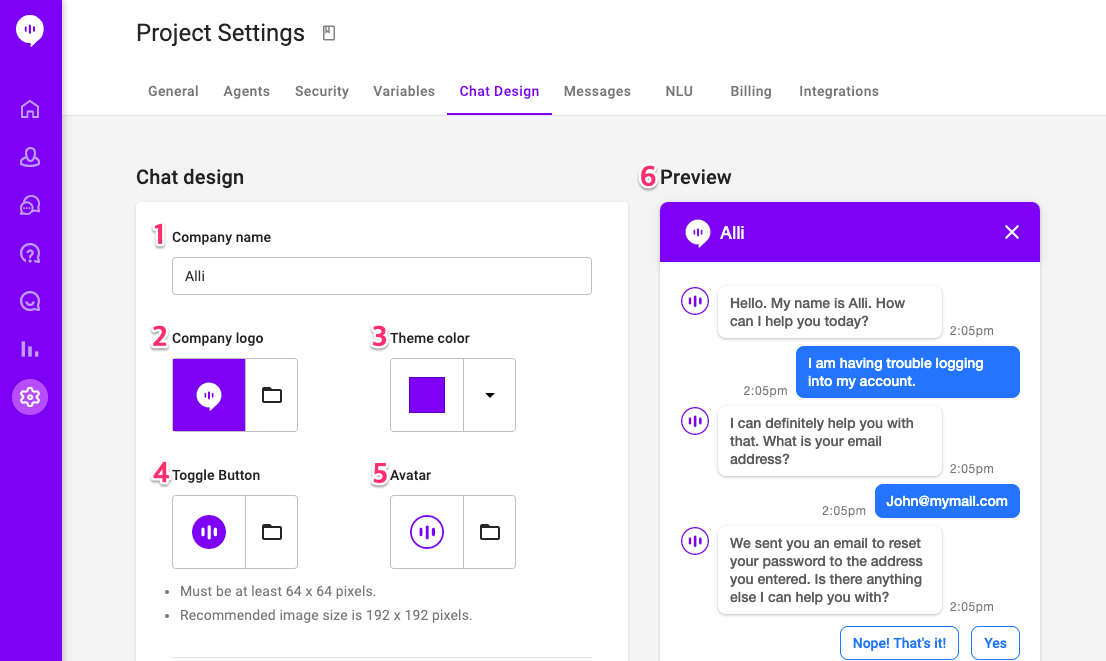
- Company Name: Customize the company name at the top bar of your chat UI.
- Company logo: Update your company logo at the top bar of your chat UI.
- Theme color: Customize the color scheme of your chat UI.
- Toggle Button: Update the toggle button image that opens up the chat window.
- Avatar: You can change the profile image chatbots talk to in your chat room.
- Preview: What the users see after the design changes you are making.
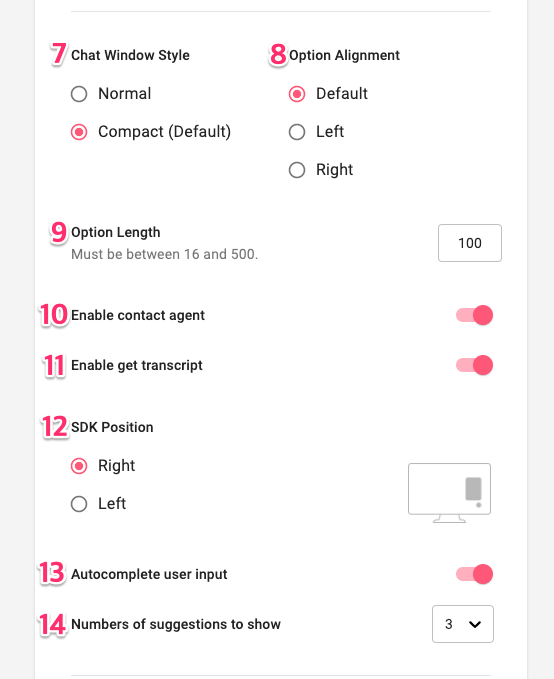
7. Chat Window Style: You can choose between normal and compact.
8. Option Alignment: You can choose how to align options for questions.
9. Option Length: Maximum length of a button option.
10. Enable contact agent: You can turn Contact agent on/off . When set to On, the Connect agent option will appear at the bottom of the chat UI.
11. Enable get transcript: You can turn Get transcript on/off. When set to On, the Get transcript option will appear at the bottom of the chat UI. Your user can request to receive a copy of the transcript to be emailed to them.
12. SDK Position: You can choose where to locate the chat window.
13. Autocomplete user input: Turn this on to see autocompleted Q&As when customers enter questions.
14. Number of suggestions to show: Decide how many autocompleted Q&As show when #13 is on.
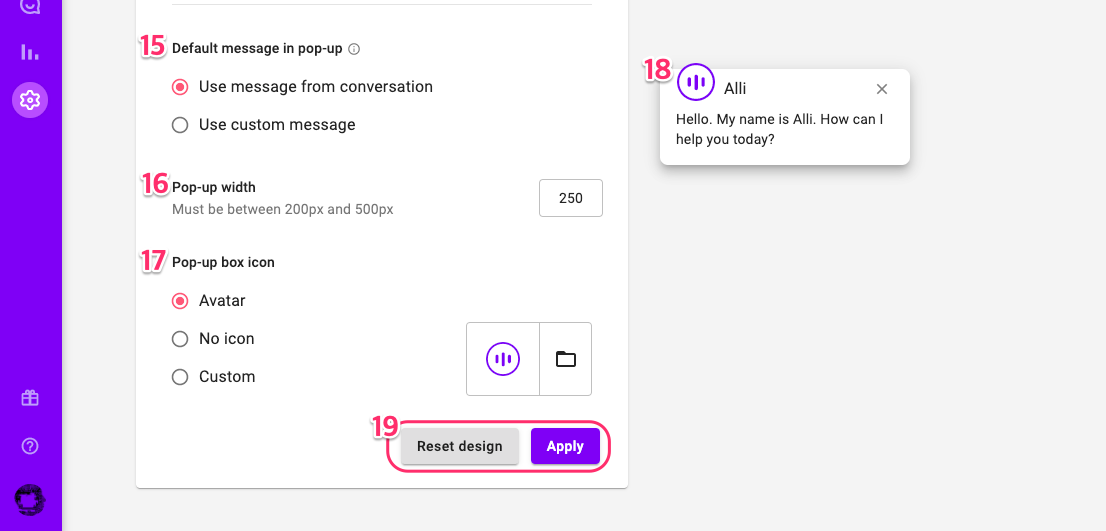
15. Default message in pop-up: A pop-up is shown when a customer first arrives to your webpage, and the chat window opens up when the customer clicks the pop-up. You can choose to show the last message from the conversation on the pop-up or to set a custom message.
16. Pop-up width: Change the width of the pop-up.
17. Pop-up box icon: This decides the icon image on the pop-up.
18. Pop-up preview: This is how the pop-up will look like once you apply the changes you made.
19. You can reset the design to the default setting or apply the changes you made.
Learn More About Allganize's Technology