Alli User Guide - Document Search
Document Search is one of Alli's core features, allowing users to ask open-ended questions and get answers directly from your documents.


Document Search is one of Alli's core features, allowing users to ask open-ended questions and get answers directly from your documents. For example, you can use document search to help run or a self-service internal help desk, among other uses.
In Alli, you can upload your customer support manual, return policy, etc. to be processed by our Document Search technology which will automatically extract answers from documents you uploaded when the user asks a question.
Table of Contents
- Managing Documents
- Document Search with Skills
- Document Search from the Dashboard
- Document Search Settings
- Document Search Training
- Other Features
Managing Documents
Alli cannot answer questions about your documents if it has never seen them before! So first we must set up your knowledge base to Alli.
Uploading Documents
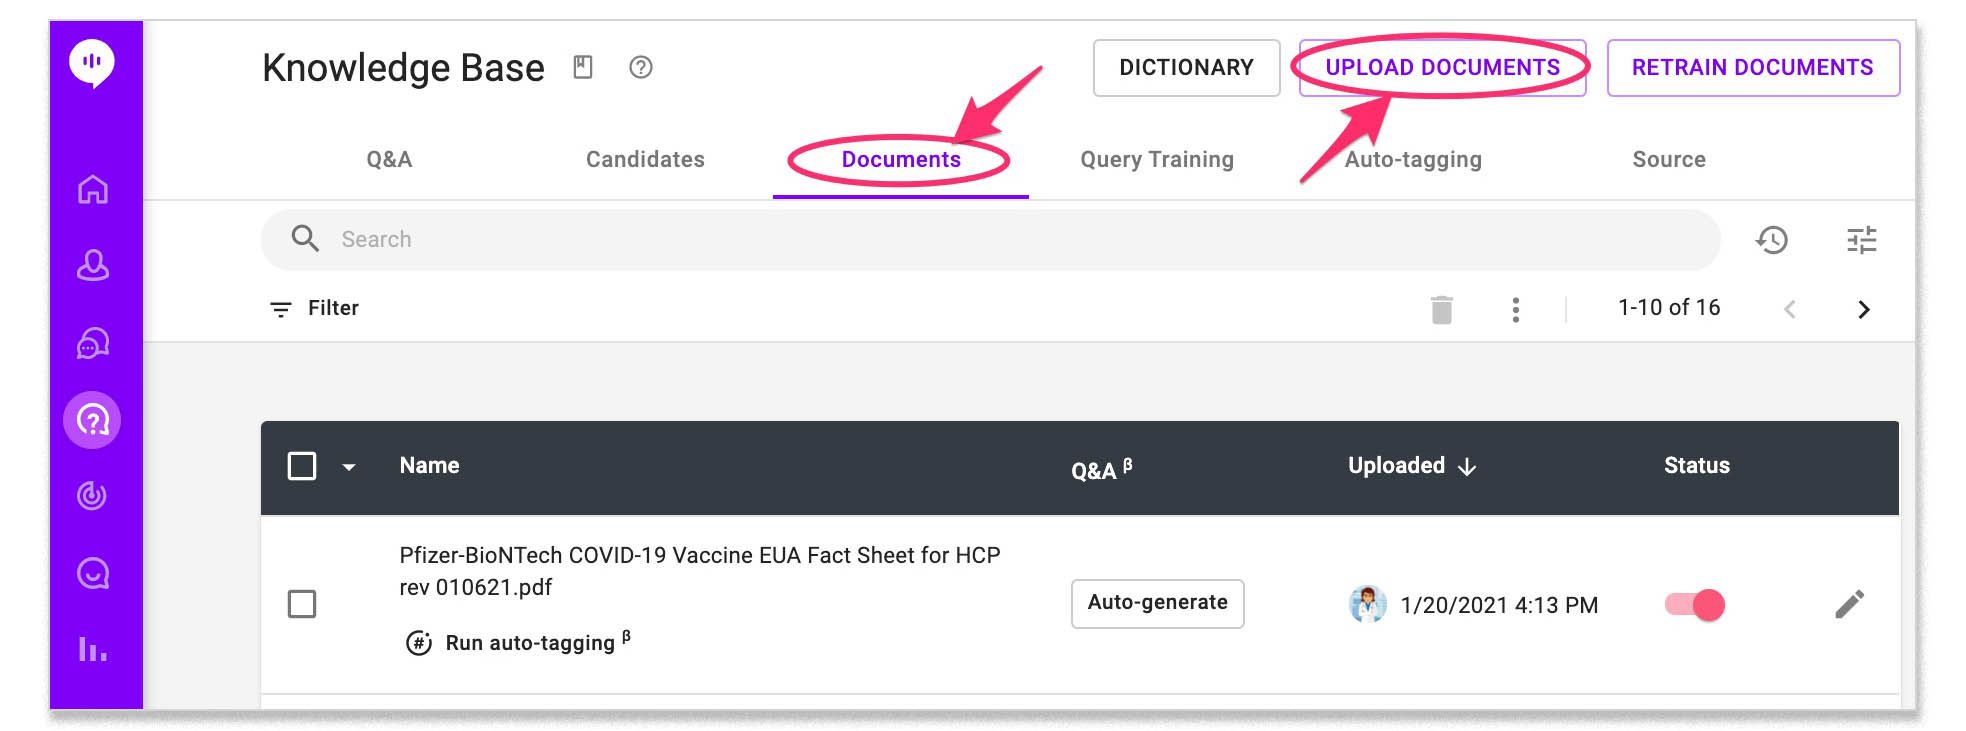
To start, go to the Documents tab on the Knowledge Base page and upload a document. We currently support txt, xlsx, docx, doc, ppt, pptx, jpg, jpeg, png, and pdf format.
If your uploaded document is pdf, image, or docx format, you can press the eye icon to see a preview. You can also click the document title to download any uploaded document.
Hashtags and Footers
You can easily organize and manage the uploaded documents using hashtags. Click on the edit icon to add hashtags to the documents or update the footer for search results from this documents.

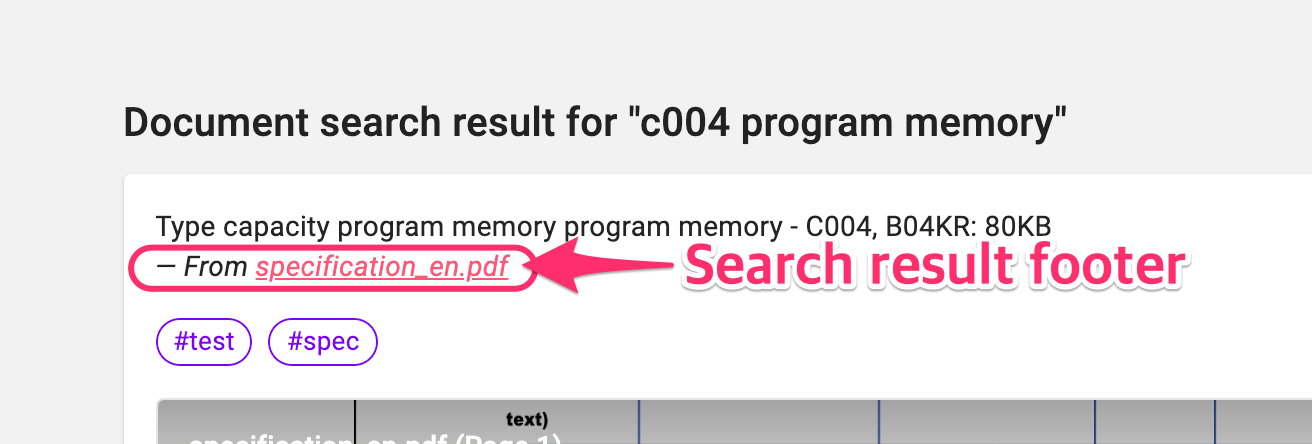
As default, Search result footer has a link to download the source document. You can add any text, links, images, videos, or files using the editor.
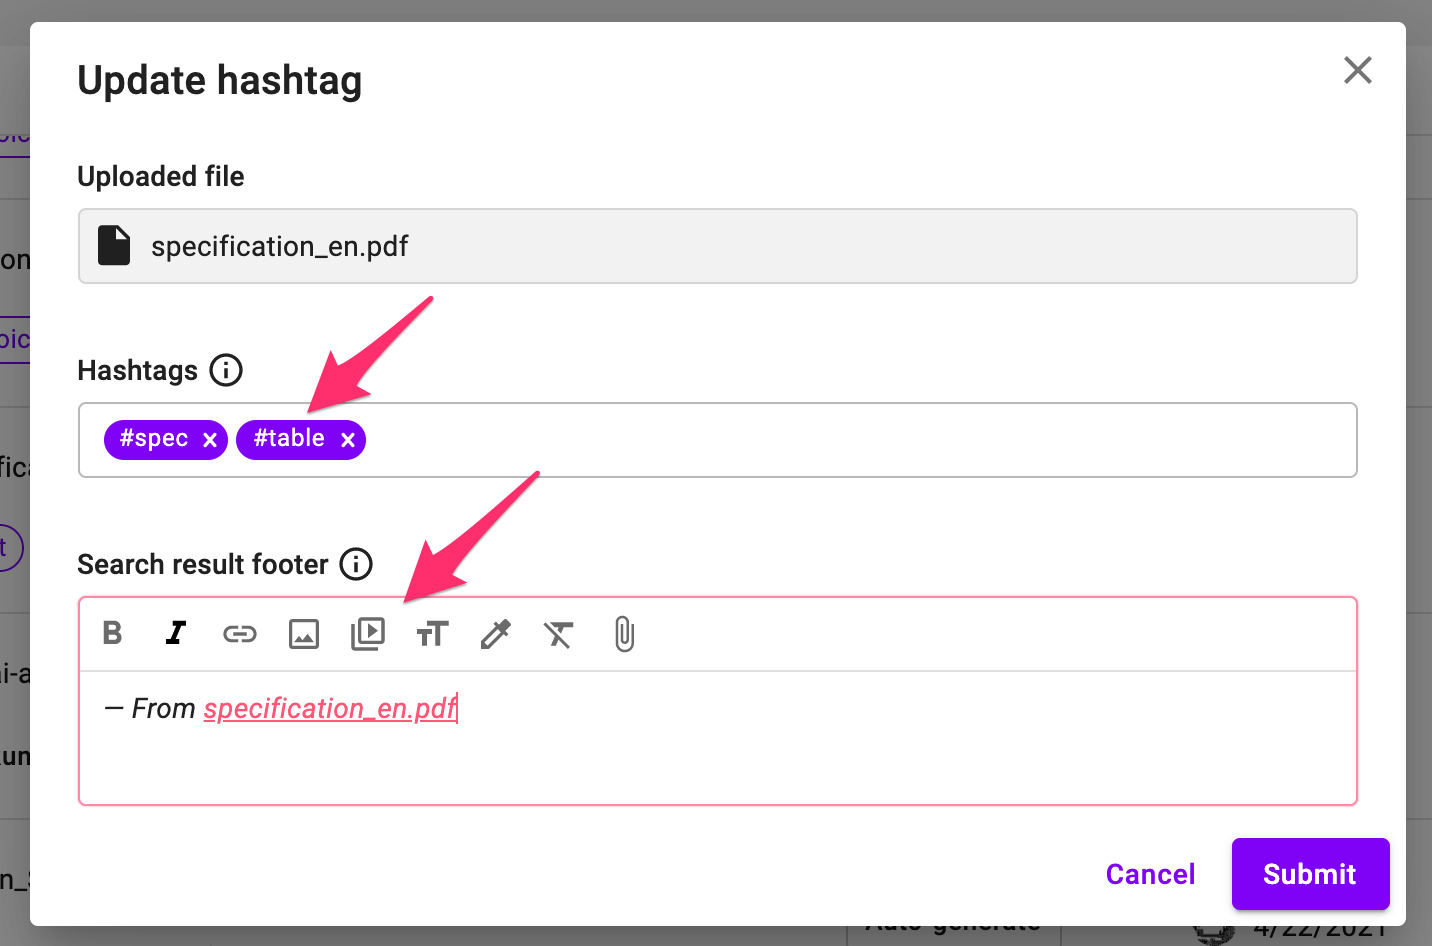
The search result footer will be shown at the end of the search result extracted from the document.
You can also generate hashtags automatically. Simply press "Run auto-tagging" under any document and Alli will attempt to give a label based on similar documents already uploaded with the same hashtags. This only works once you have uploaded enough similar documents and given them hashtags.
Dictionary
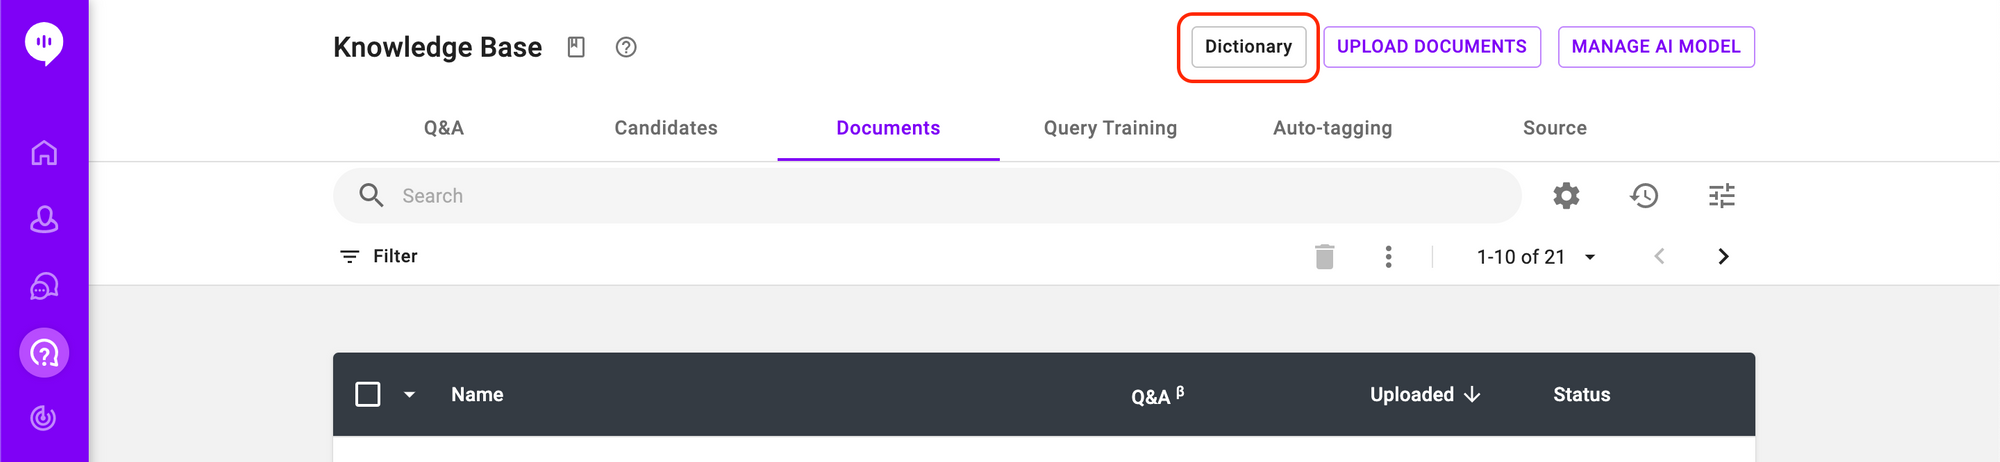
To register synonyms, go to Knowledge Base > Documents and click the DICTIONARY button.
You can register primary words and synonyms manually in the table, or upload sets of synonyms. You can also search, edit, and/or delete previously registered synonyms.
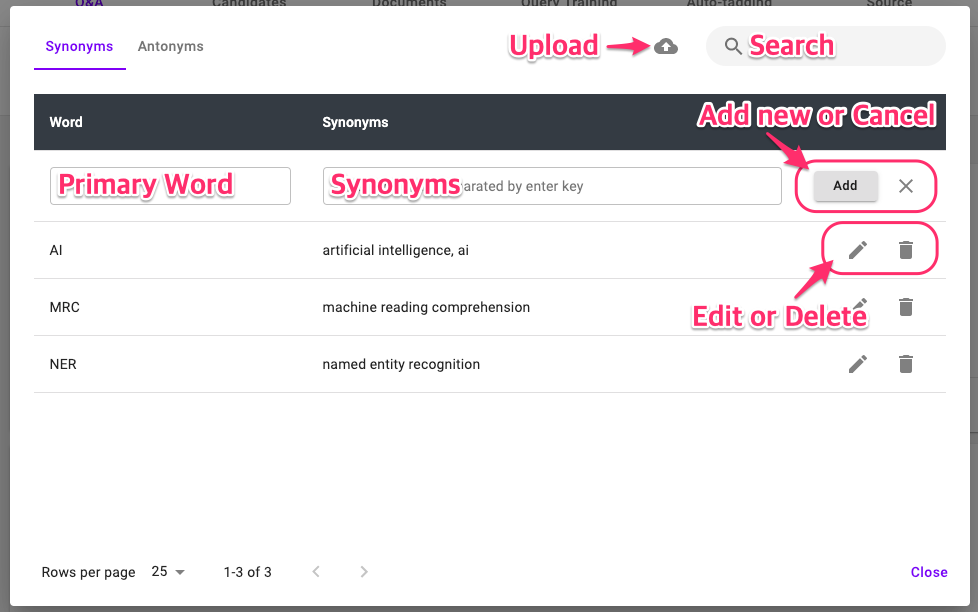
You can also edit Antonyms when editing the dictionary from the Q&A menu. Antonyms do not apply to Document Search so they are inaccessible here.
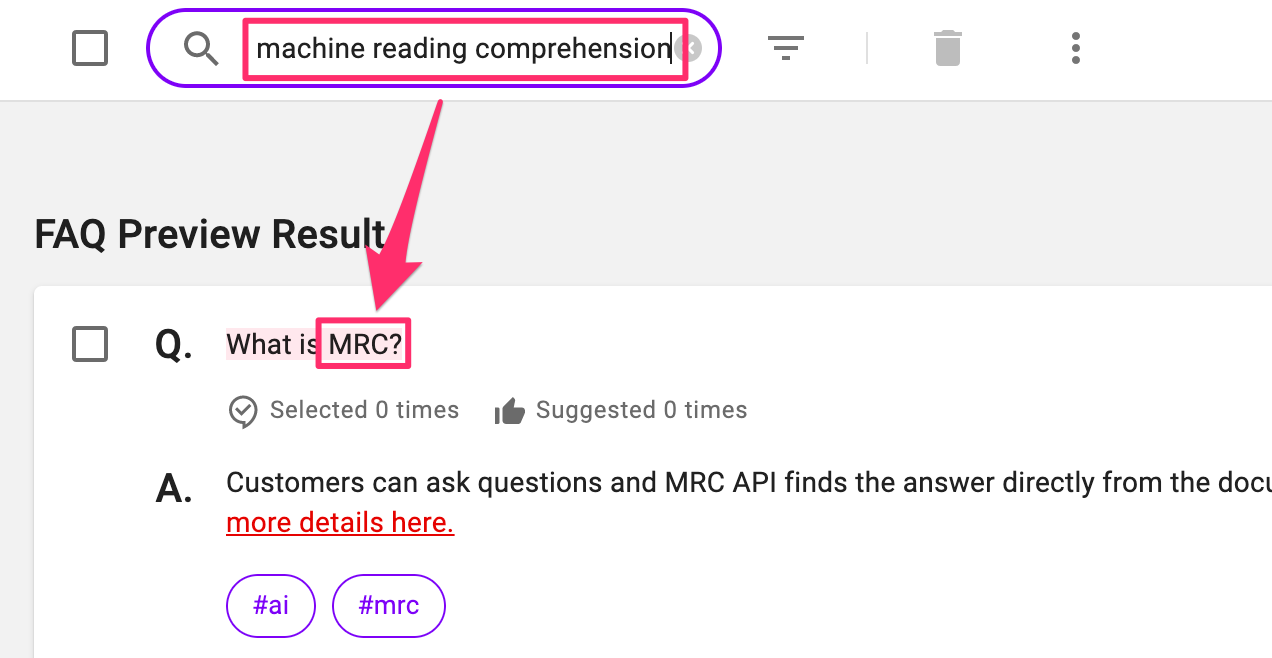
Once you have added synonyms, the AI will recognize the synonyms as the same as the target words.
Please note that the dictionary can also be used for our Q&A feature. While the Q&A feature recognizes antonyms, Document Search does not (which is why you are unable to edit antonyms from the Documents tab.
Finding Documents
If at any point you are having trouble finding a particular document, you can use the search bar to search for documents by title.
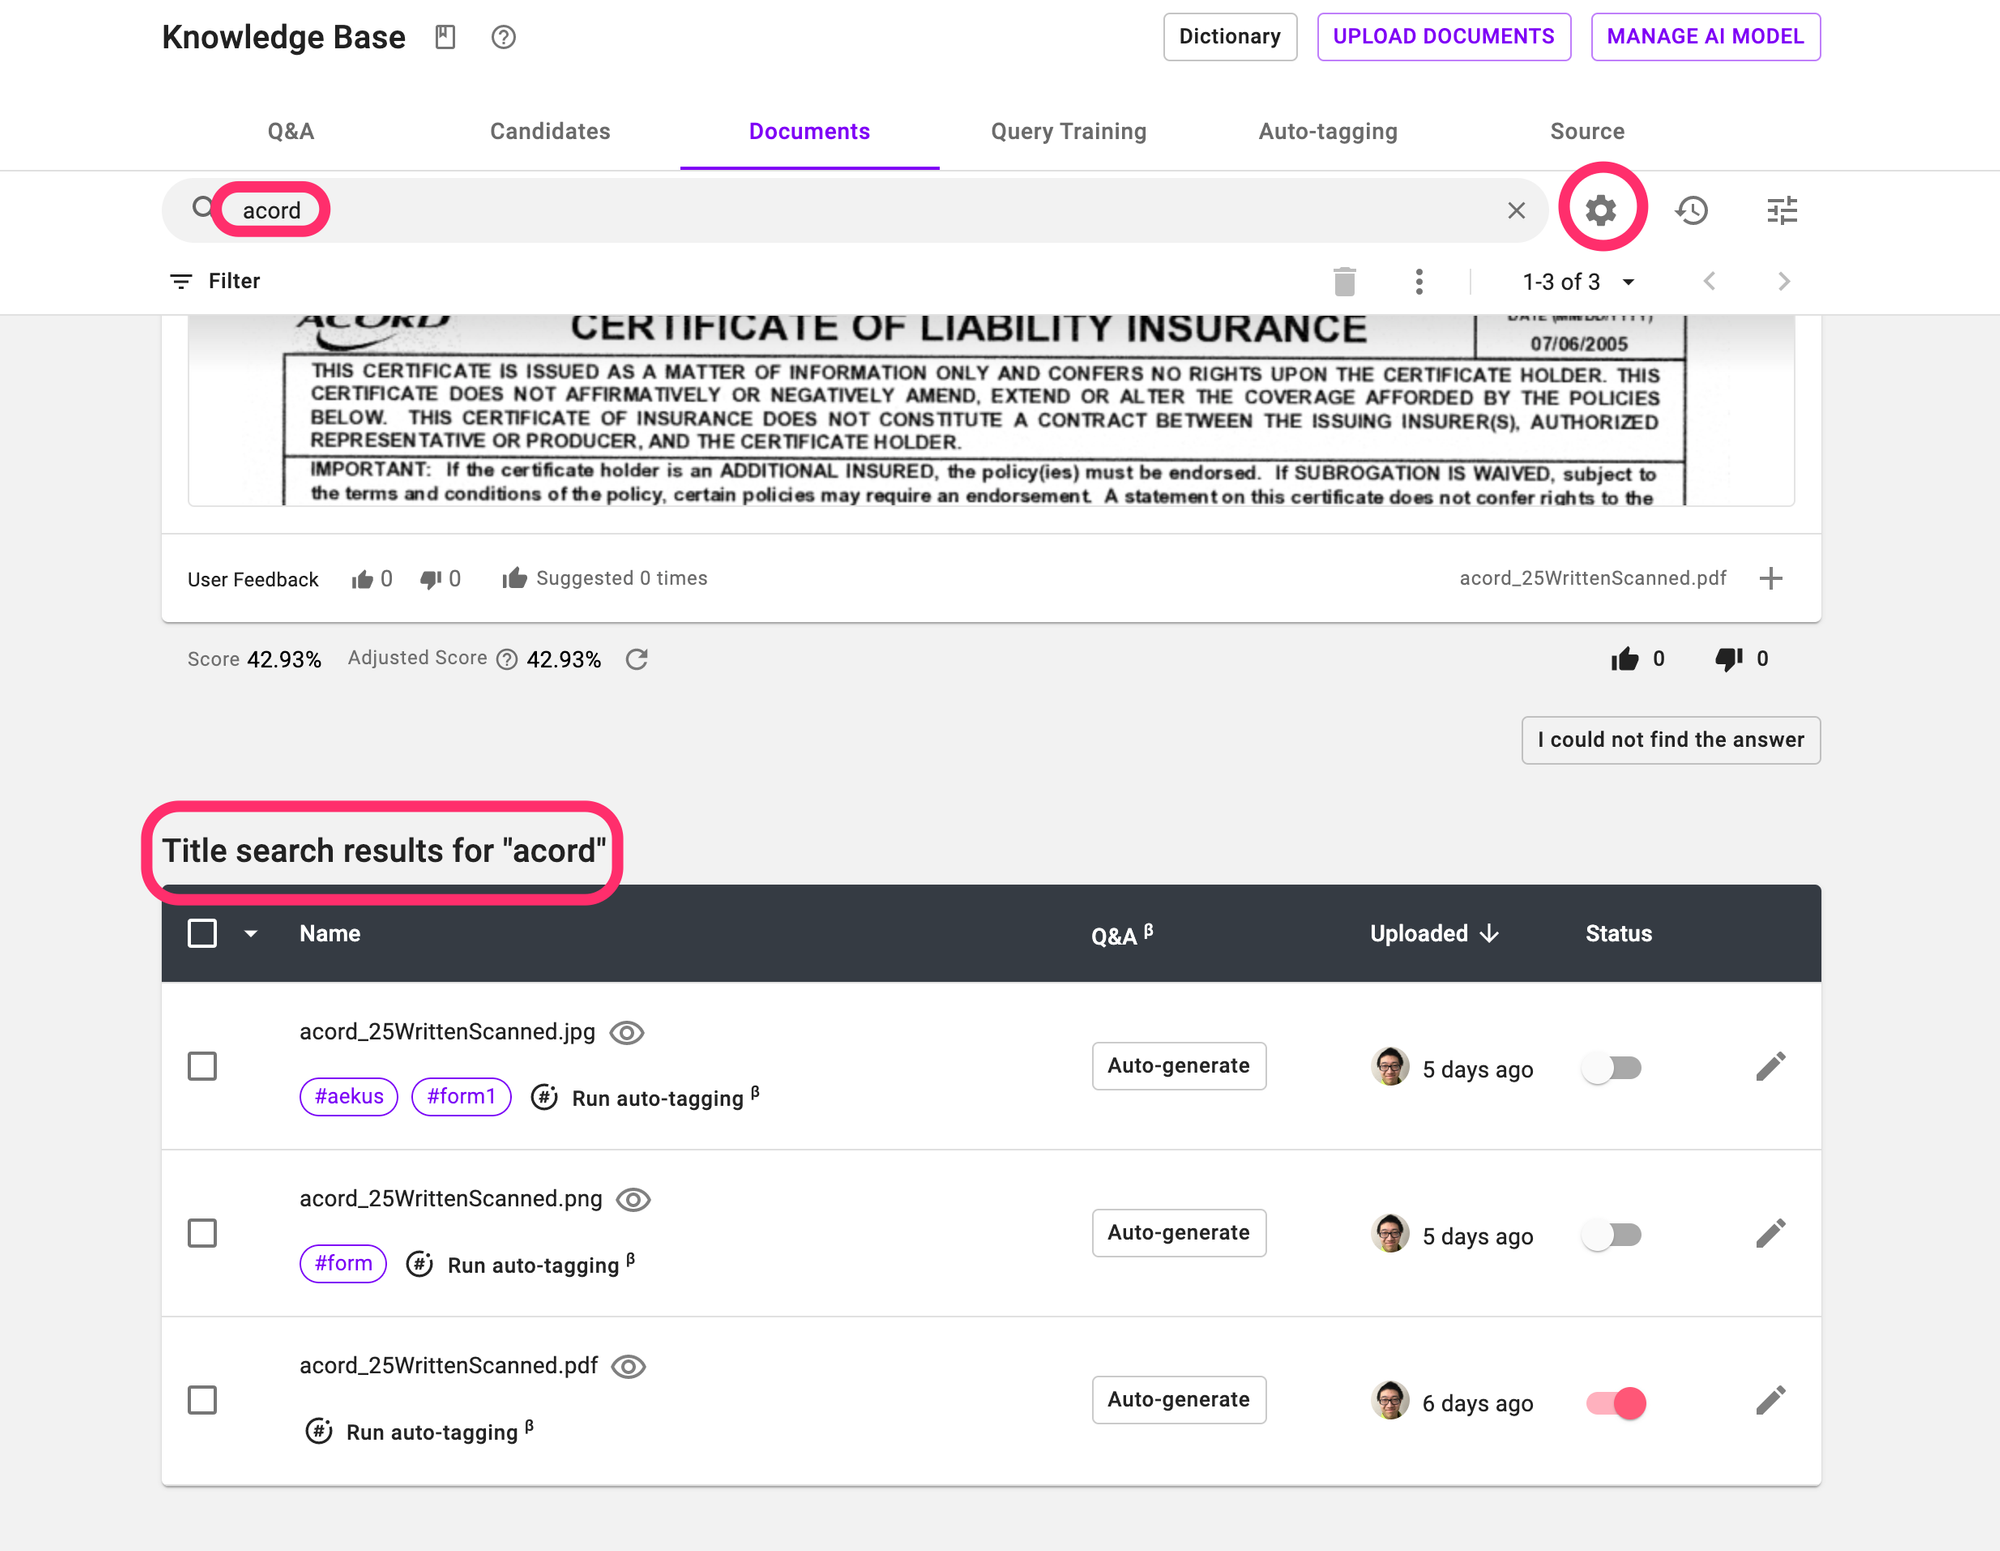
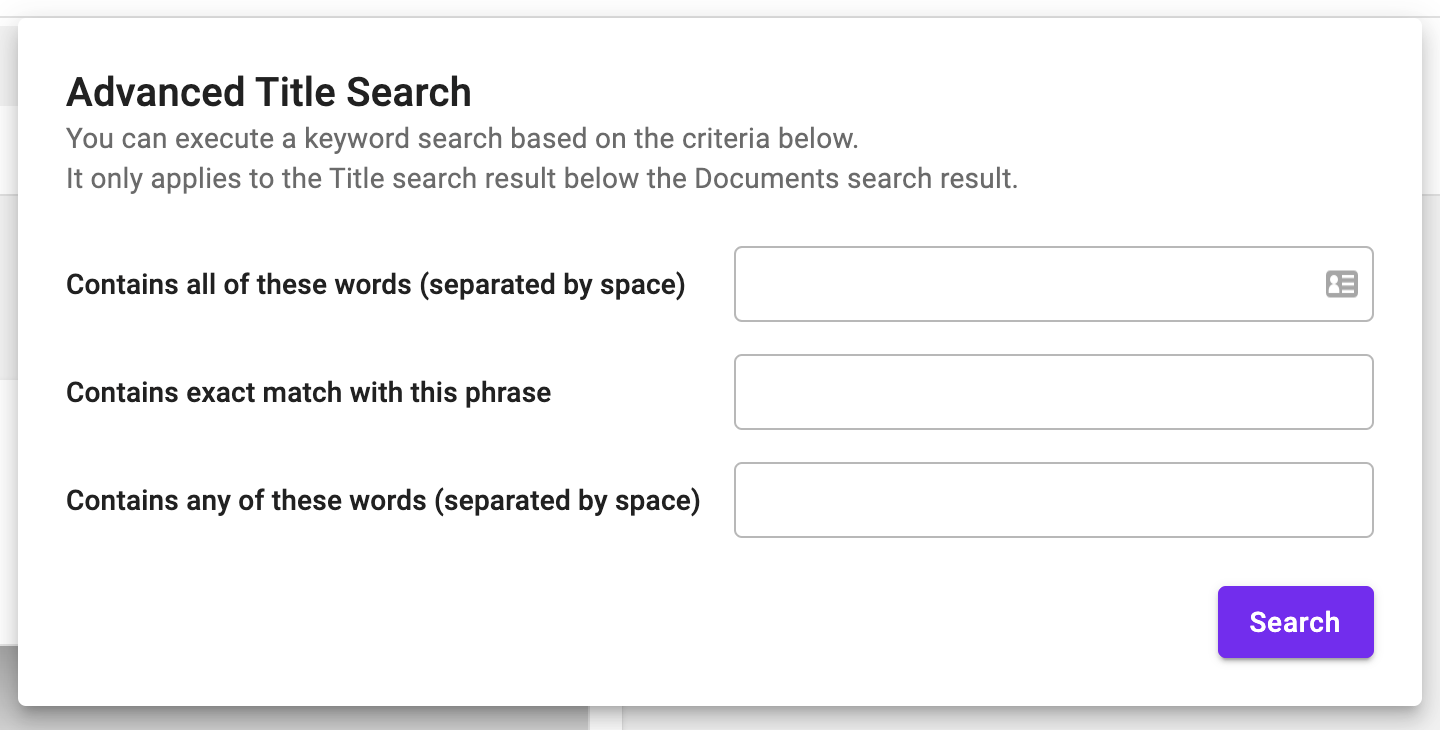
By default Alli will return all documents whose titles are similar to your search query. For a more fine-grained search, you can click the cog icon (highlighted above) for additional search options.
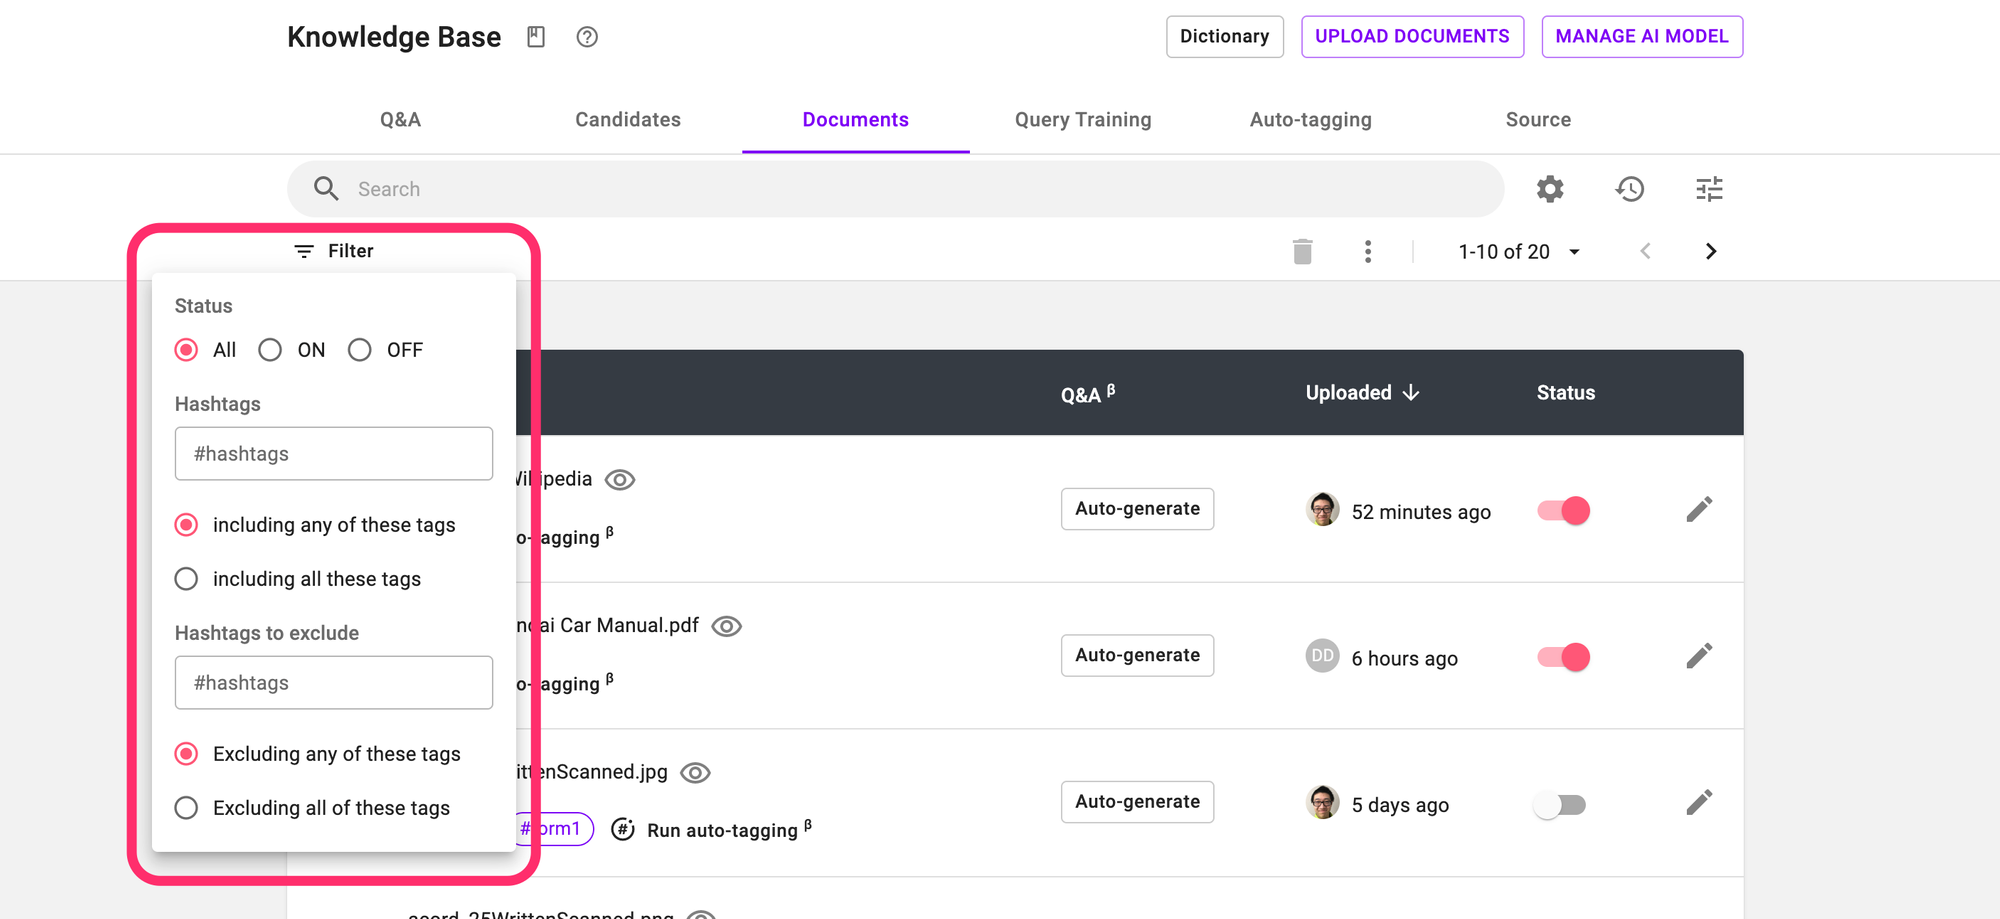
You can also filter documents by hashtag and on/off status using the following menu:

Now that we have set up our knowledge base, it is time to start asking questions! There are two main ways to do this, either through Skills (which require more set-up and are primarily designed for customers) or through the dashboard (which is easier and is primarily designed for agents and admins). We will begin with Skills.
Document Search with Skills
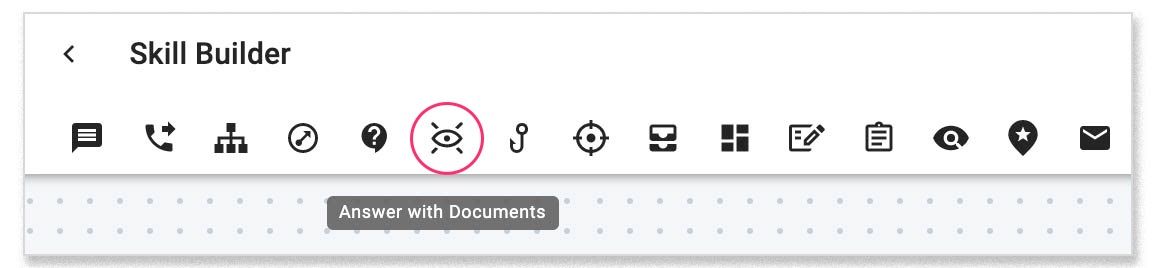
In the skill editor, you can find the 'Answer with Documents' node icon on the left side of the node icon bar. Click to create a node.
Getting Questions from User Input

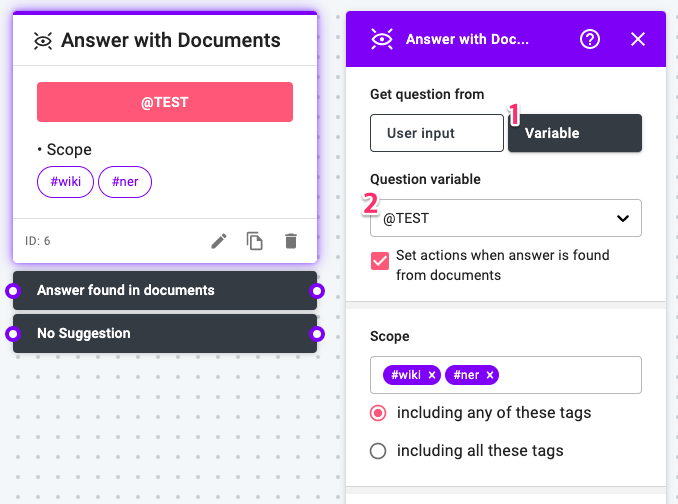
- Edit, duplicate, or remove the node.
- Select User input to ask your customer to type in a question or Variable to get the question from a user variable (see below).
- Check to instead use user input from the previous node as the question.
- Customize the question prompt.
- Check to repeat the question when entering the node.
- Check to set actions when any answer is found from documents.
- Check to use carousel UI to display extracted answers. Please see the screenshot below for a visual example.
- Select hashtags to find answers only in the documents with selected hashtags. You can select variables too, which will accordingly filter if the variable value corresponds to an existing hashtag.
If you choose to see the answers in carousel UI, they'll be displayed as below. You can scroll or click the left / right icon to see other answers. In mobile, swipe to do the same.
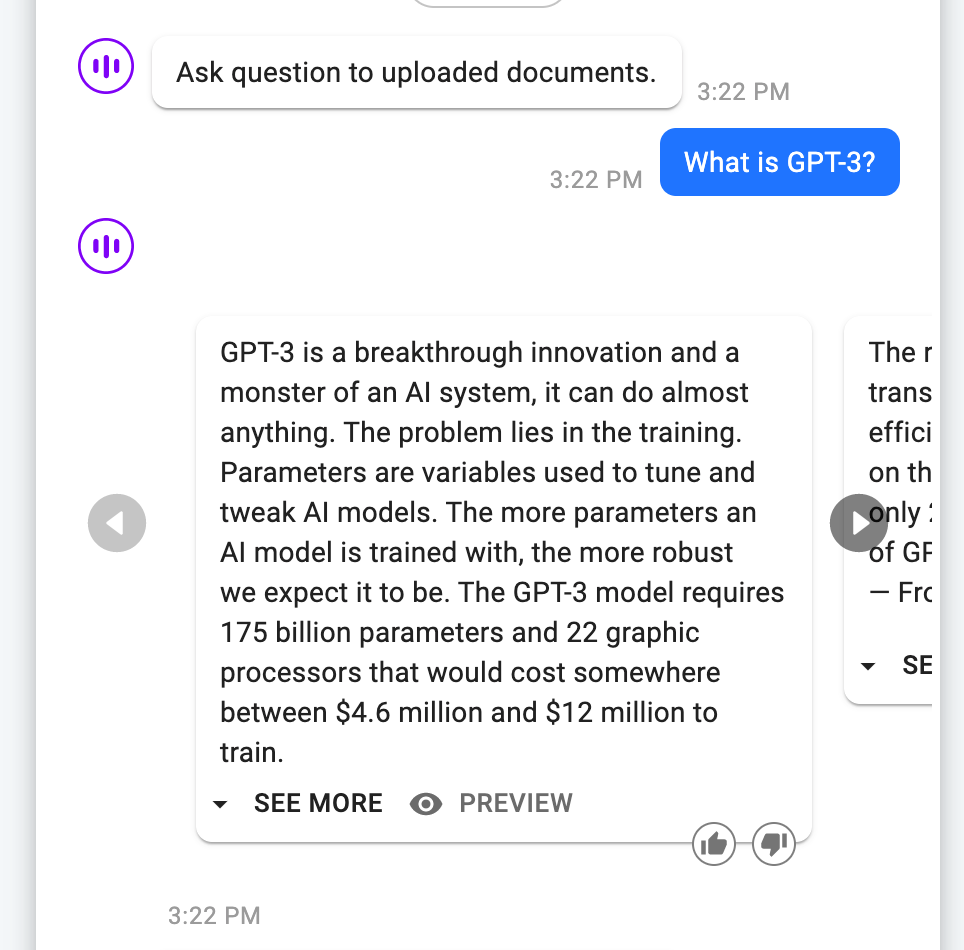
As you can see above, each answer comes with a "thumbs up" and "thumbs down" button, allowing users to give feedback on Document Search results. This feedback adjusts the corresponding scores given a certain query. Agents can also give feedback when performing Document Search, more on that below.
Extracting Questions from Variables
You can use variables to capture customers' questions or inputs. Their inputs can then be extracted from the variables and used to search for relevant information in your uploaded documents. To implement in Skills:
- Select Variable to extract customer questions. from variables that was used to capture customers' questions.
- Select the variable from the dropdown list that was used for capturing the question.
Document Search from the Dashboard
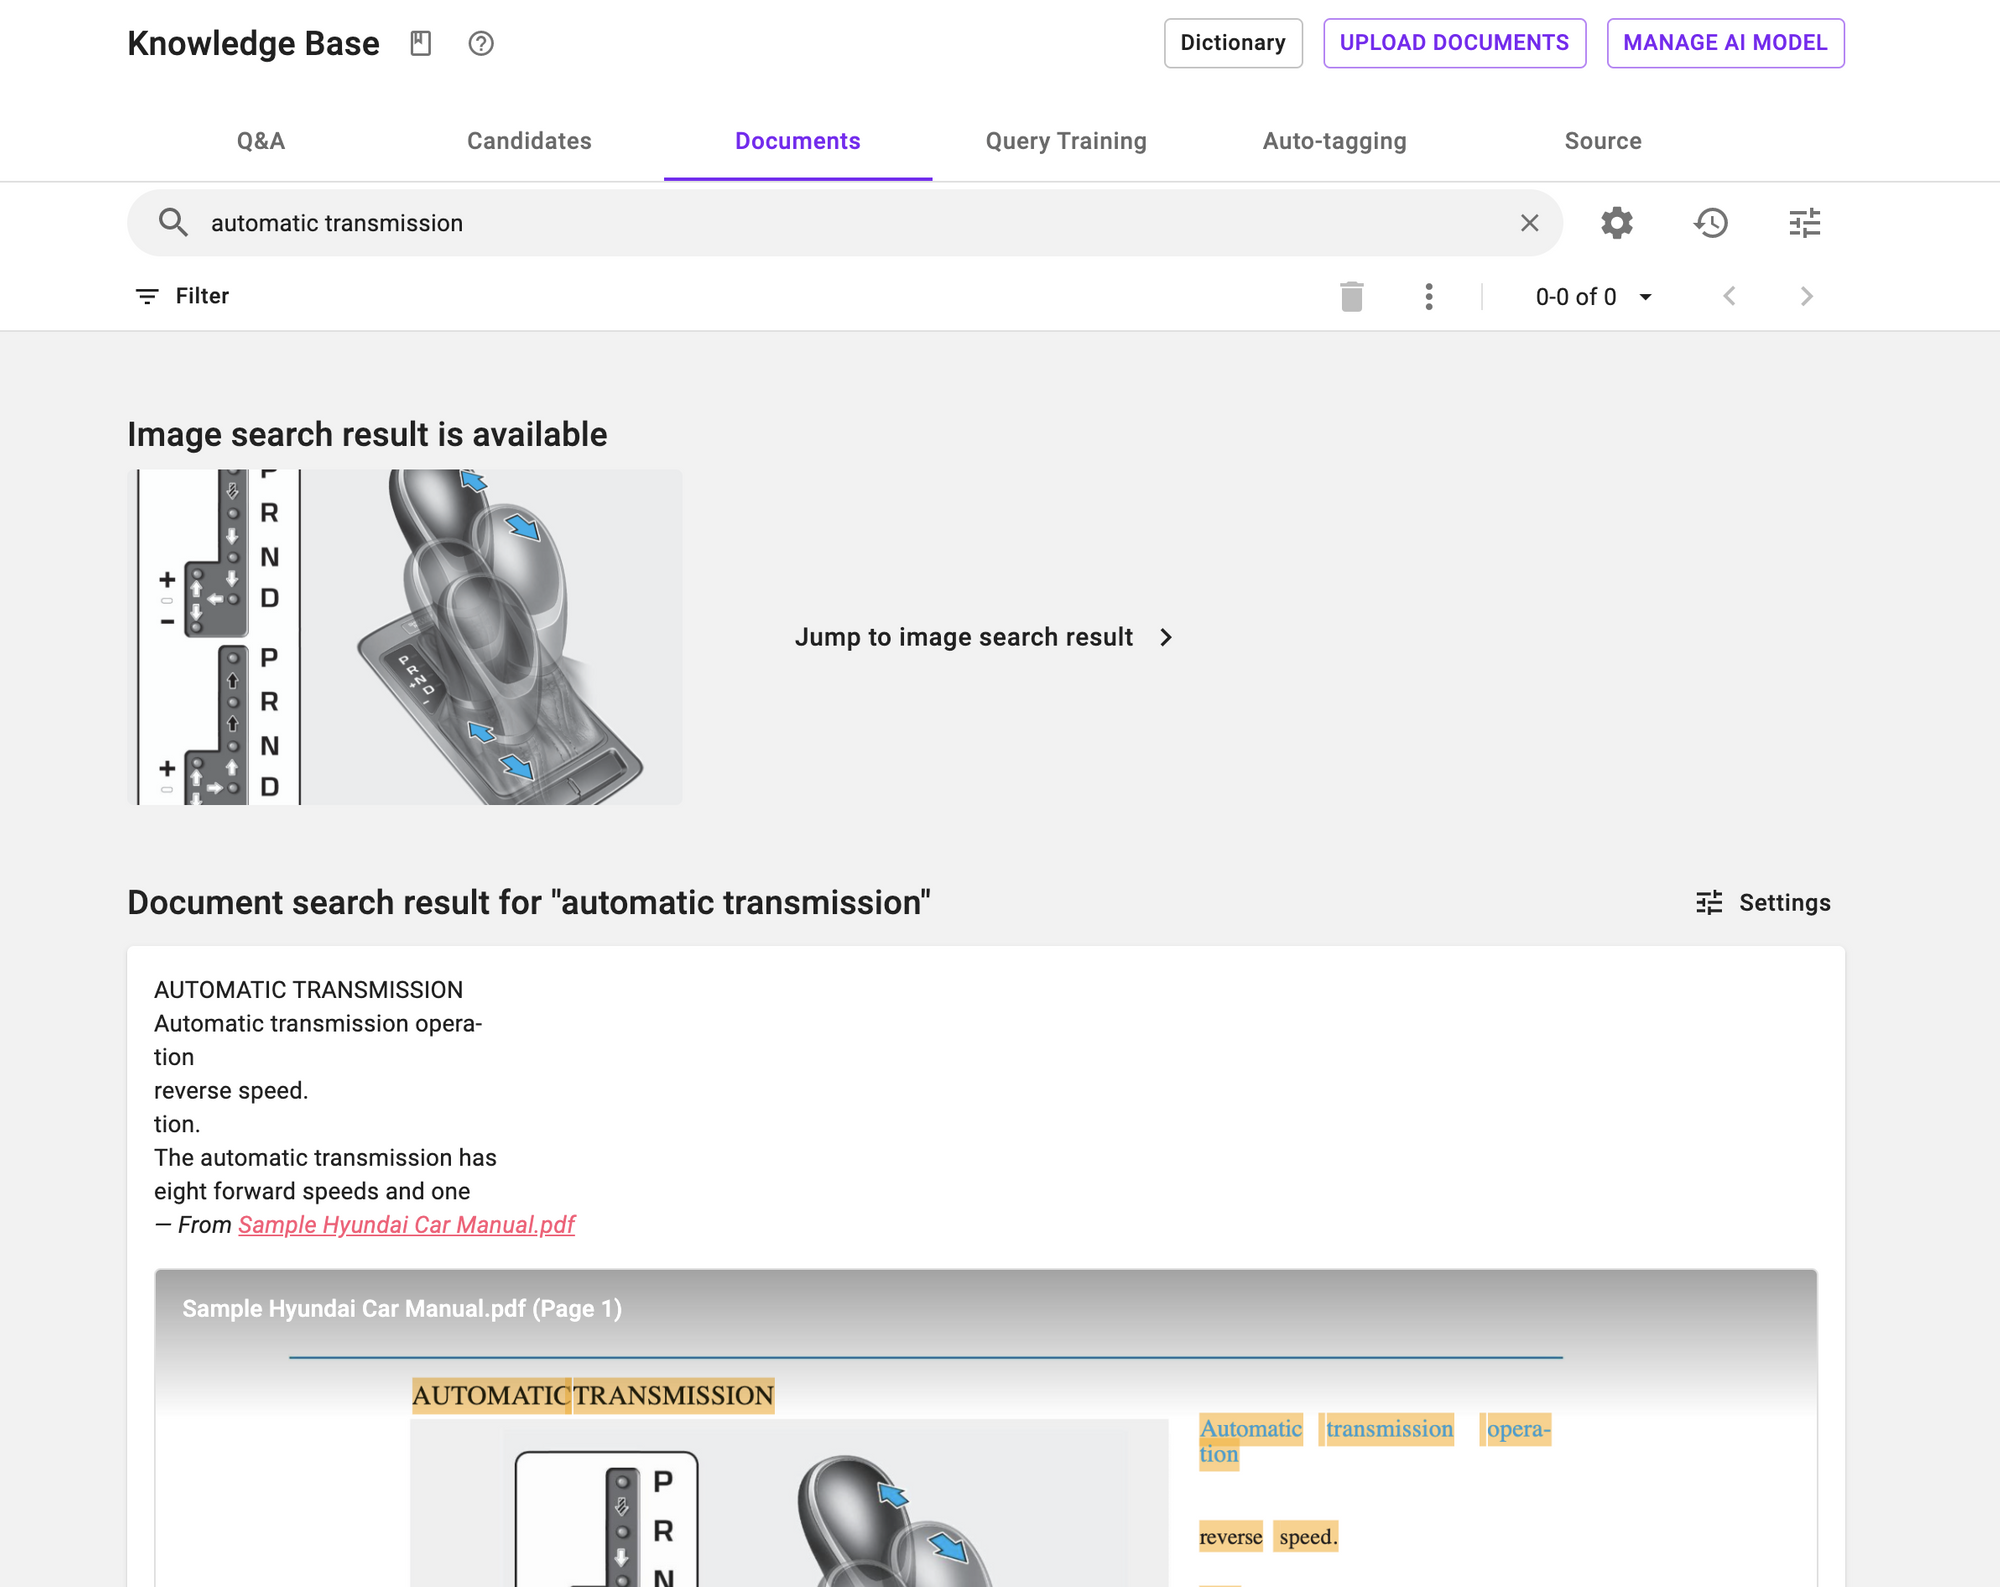
As seen in the earlier demo, Document Search queries can be run by simply typing into the search bar. By default, this will return text answers and image answers.
Filter
If you wish to narrow Document Search results to specific documents, you can do so using the Filter menu (the same one used to filter documents themselves).
Note that since Document Search only scans documents turned on, filtering by Status will not affect Document Search results.
Feedback
Go to Knowledge Base > Documents and enter your search query to see the result. You can see the thumbs-up/-down icon on the bottom right side of each Document search result.
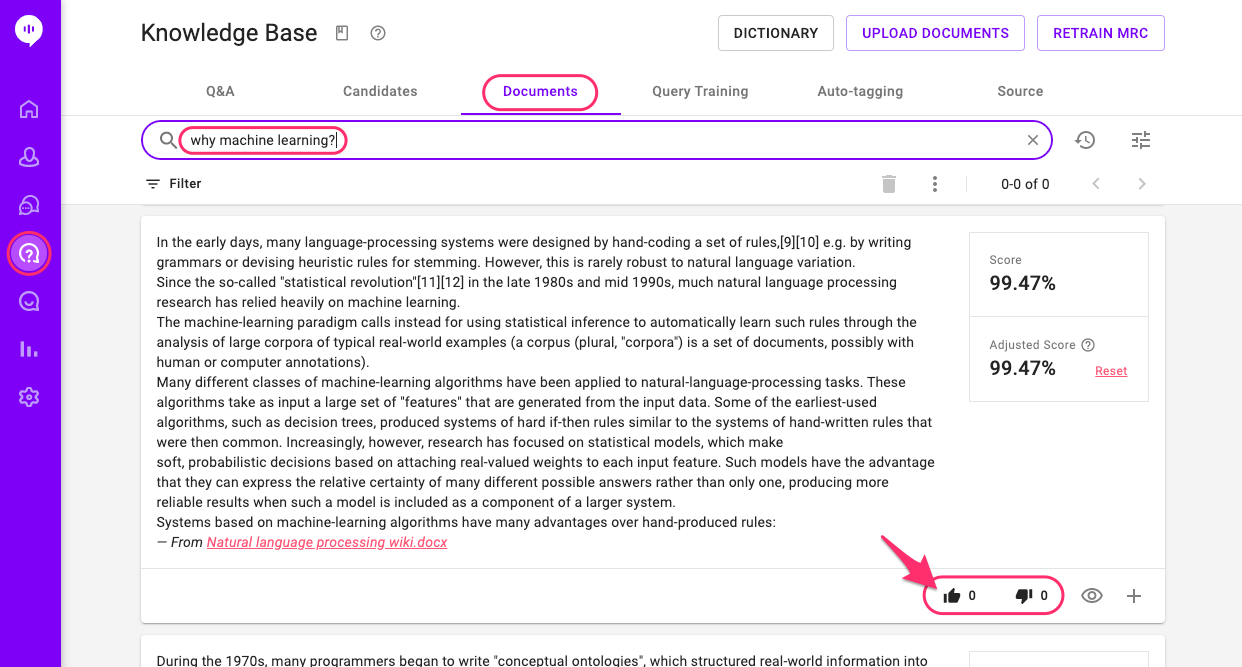
You can click up or down on each search result to give positive or negative feedback. Please remember that other agents can also give feedback for the same query. The total number of feedbacks will be shown next to the thumb up or down icon.
After you give your feedback, try the same search query again. You'll see the Adjusted Score has changed and is affecting the order of the search results.
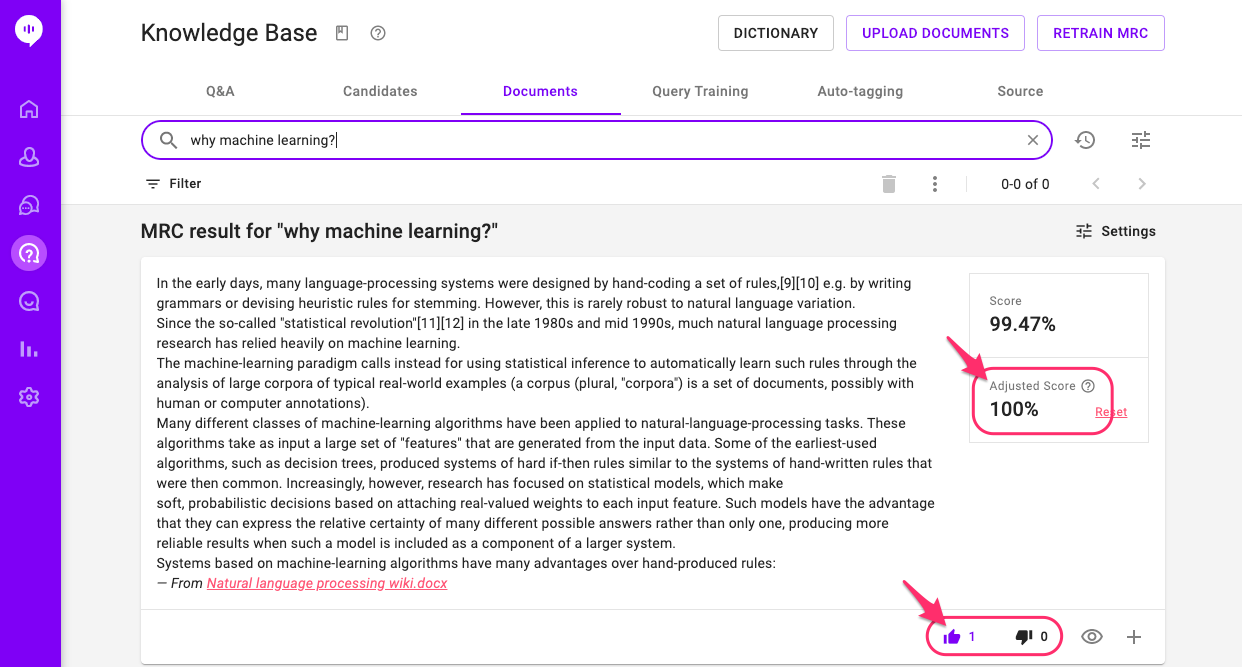
From the screenshot above, you can click on the up icon again to cancel your feedback or the down icon to change your feedback to negative.
We have a separate user guide on Agent feedback. For more details, see here: Agent Feedback.
Document Search Settings
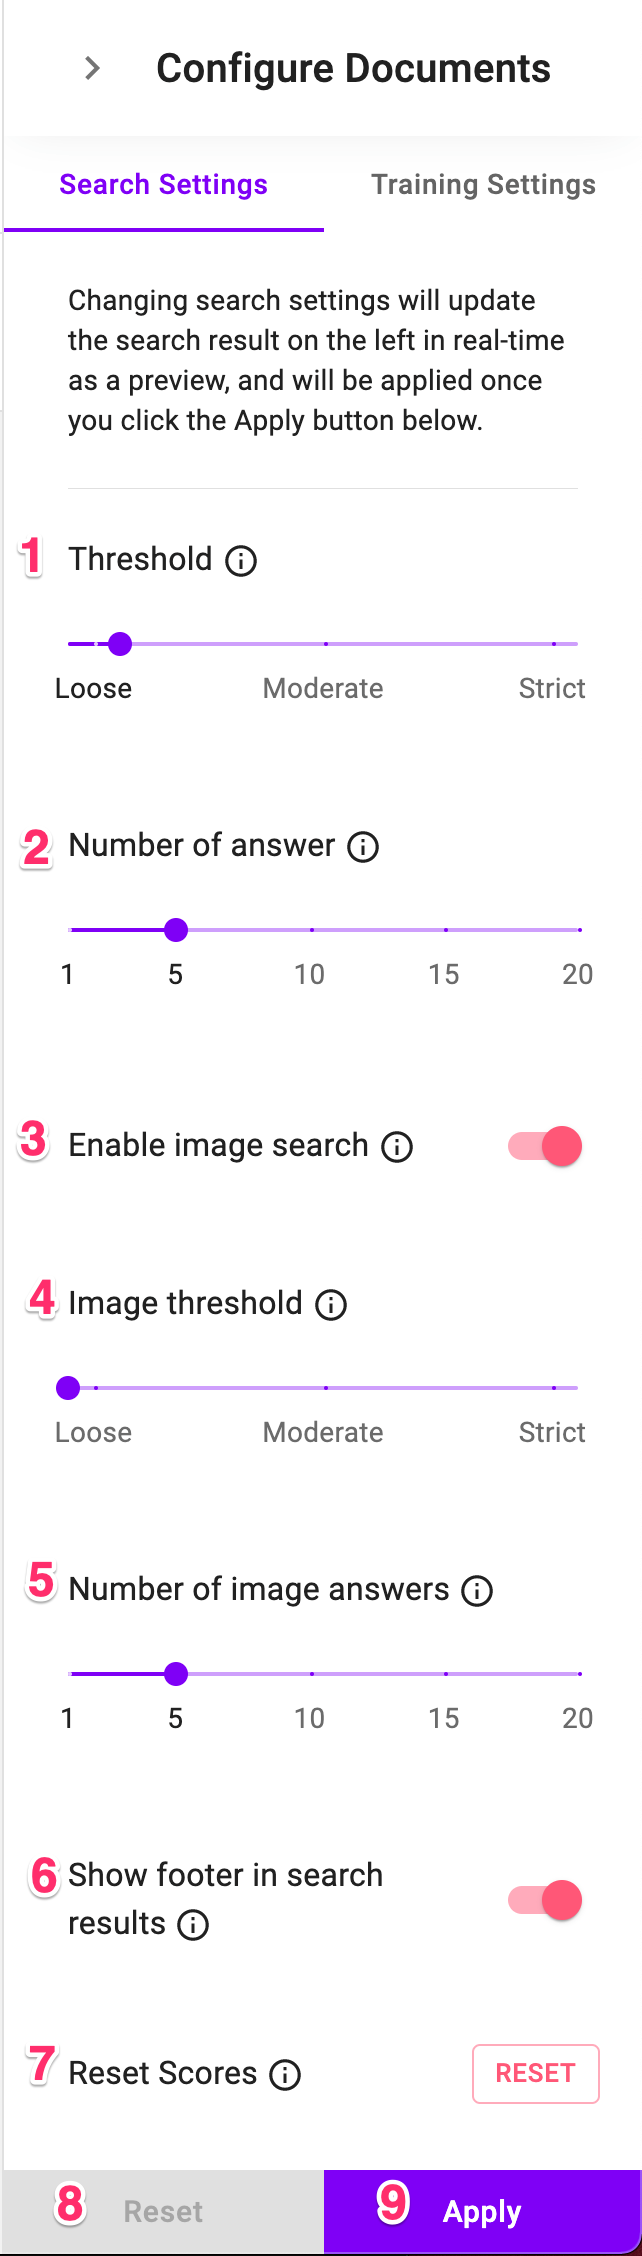
- Threshold - Score threshold to filter relevant text answers found from documents (Alli only shows answers with higher Score than this value)
- Number of answer - Number of text answer candidates to be shown
- Enable image search - Whether or not to include image search results
- Image threshold - Score threshold to filter relevant image answers found from documents (Alli only shows answers with higher Score than this value)
- Number of image answers - Number of image answer candidates to be shown
- Show footer in search results - Whether to show the footers in search results
- Reset scores - Reset user/agent feedback and corresponding score adjustments
- Reset - Reset any changes made
- Apply - Save changes
You can enter queries in the search field and adjust the configurations to preview the results instantaneously.

Document Search Training
For full instructions, please refer to this user guide: End-to-End Document Search Optimization.
To manage training data, open "Knowledge Base" -> "Documents" -> "Manage AI Model" -> "Manage Training Data."
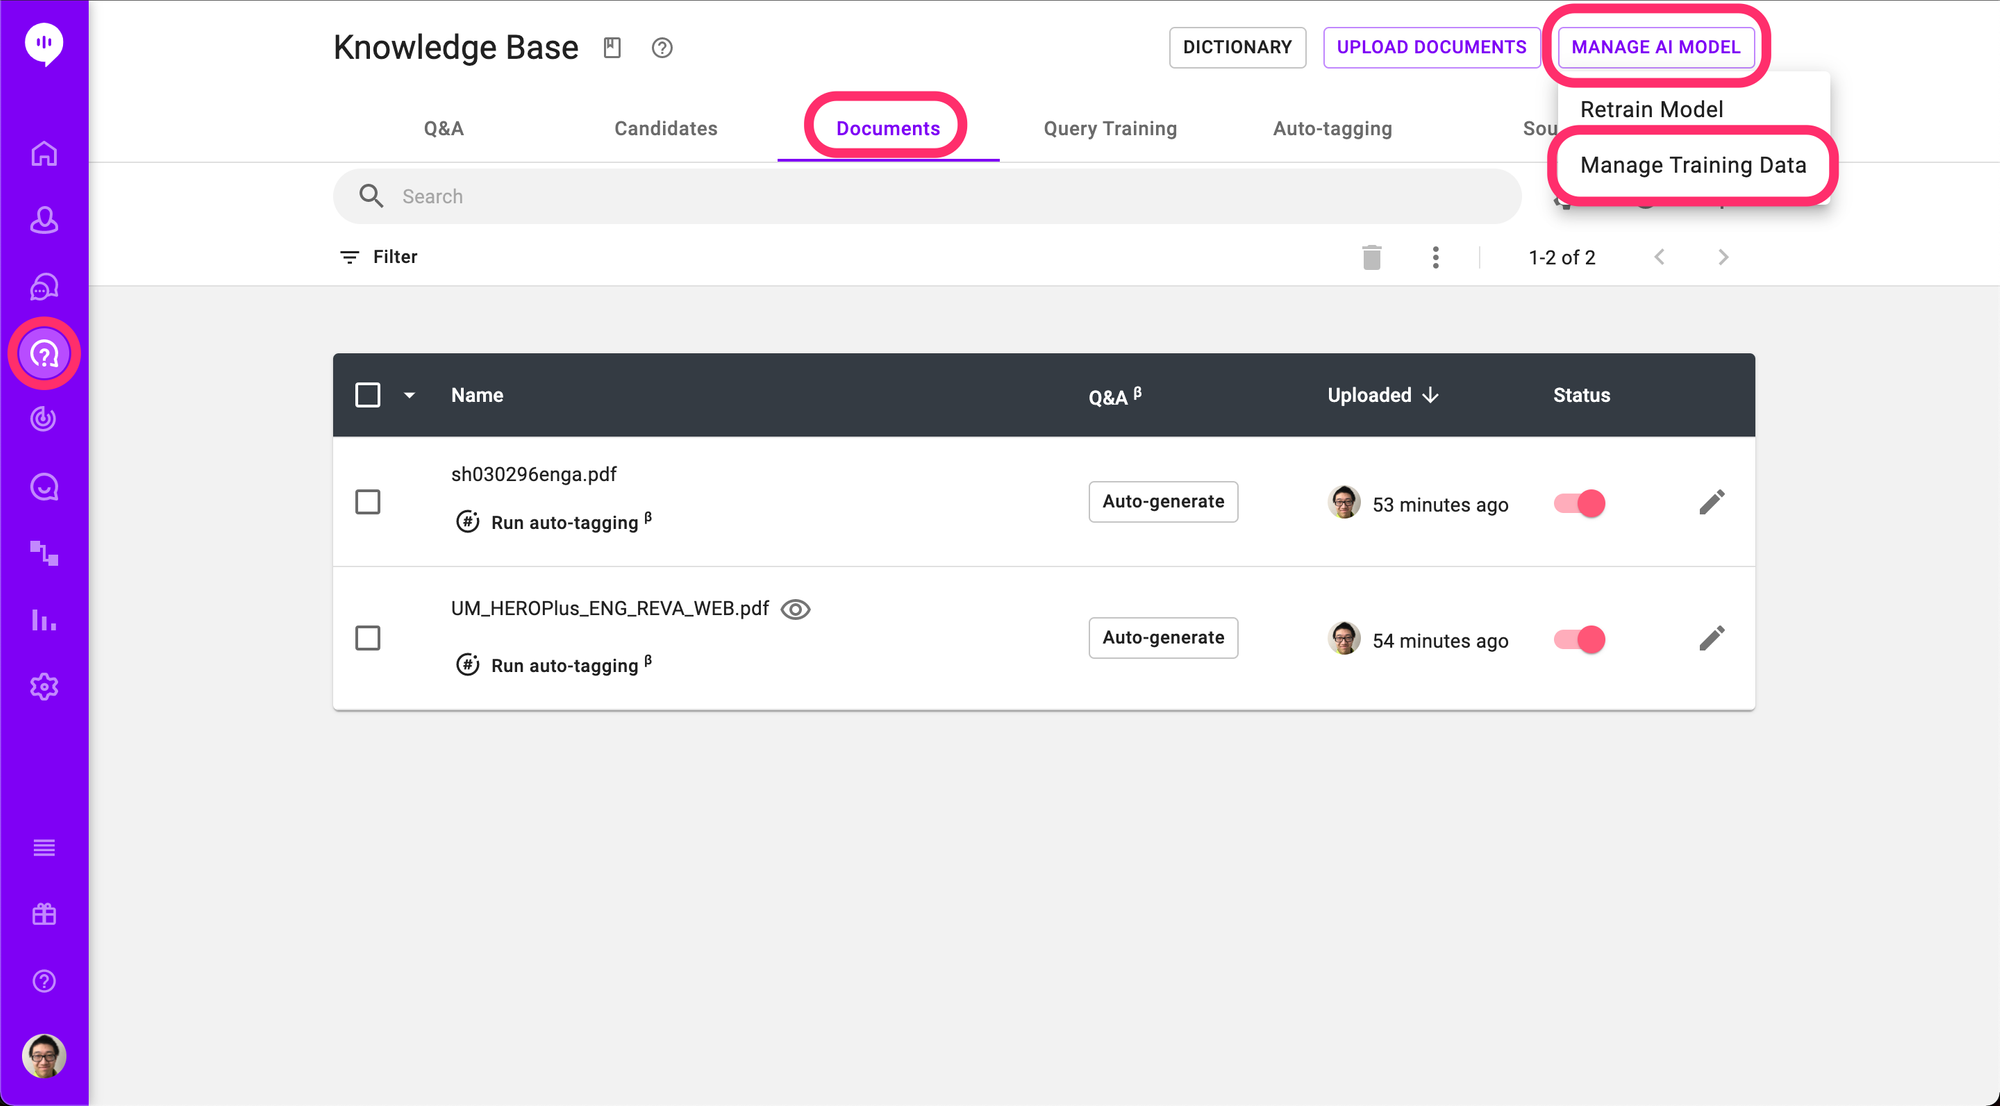
Here you can manually enter training data or modify/delete existing entries. You can also upload training data in bulk by clicking the upload icon. Keep in mind that question-document pairs are unique, so you cannot have two entries with the same questions and document titles.
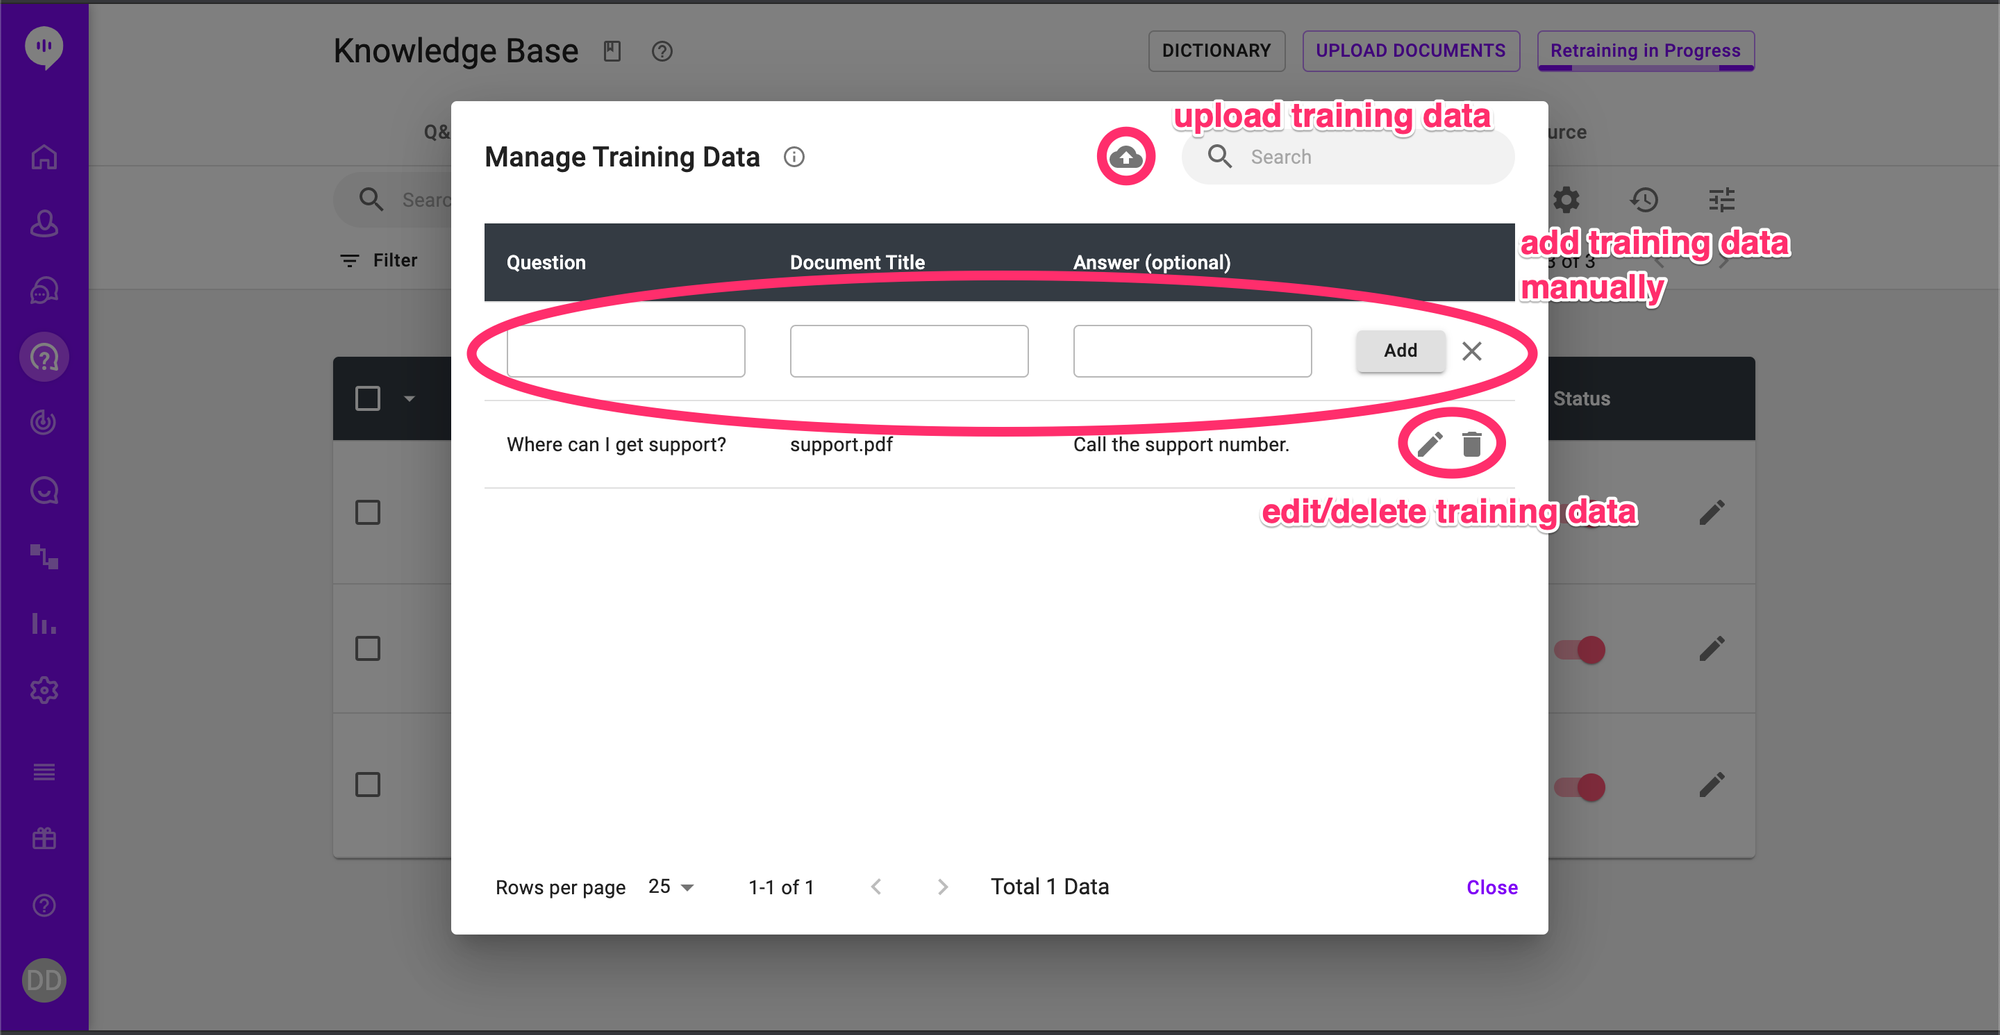
In the uploaded file, please label your first column "Question", your second column "Document Title", and your third column "Answer". "Question" and "Document Title" are required fields. A sample file with the correct format can also be downloaded from this window.
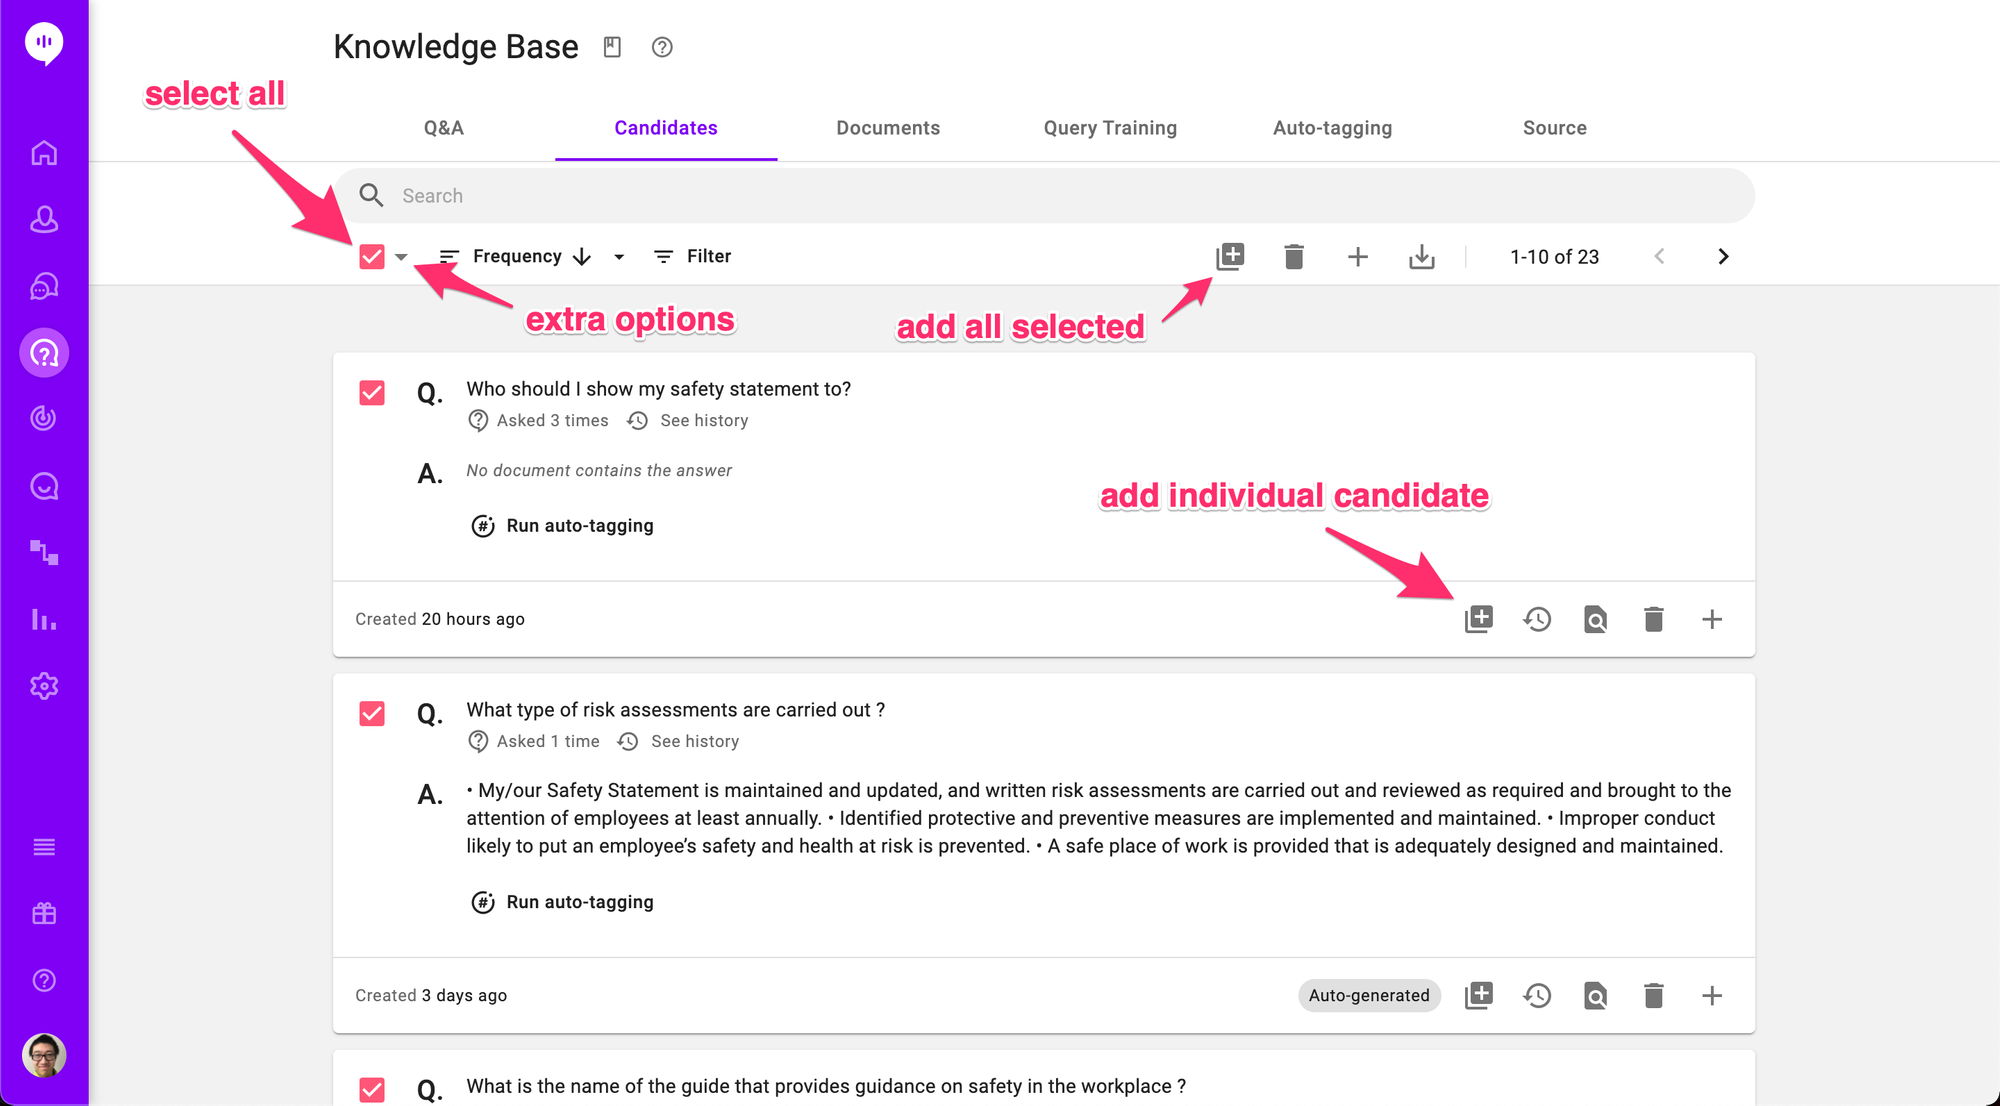
You can also add training data directly from your Candidates. Please note that Candidates with only question content cannot be added to training data.
Once your training data is ready, you must retrain your model to see the effects. Return to the Documents page and click "Manage AI Data" -> "Retrain Model."
You can also configure training, please refer to the full user guide: End-to-End Document Search Optimization.
Other features
There are a few other features that do not quite fit in to any other section.
View and Download History
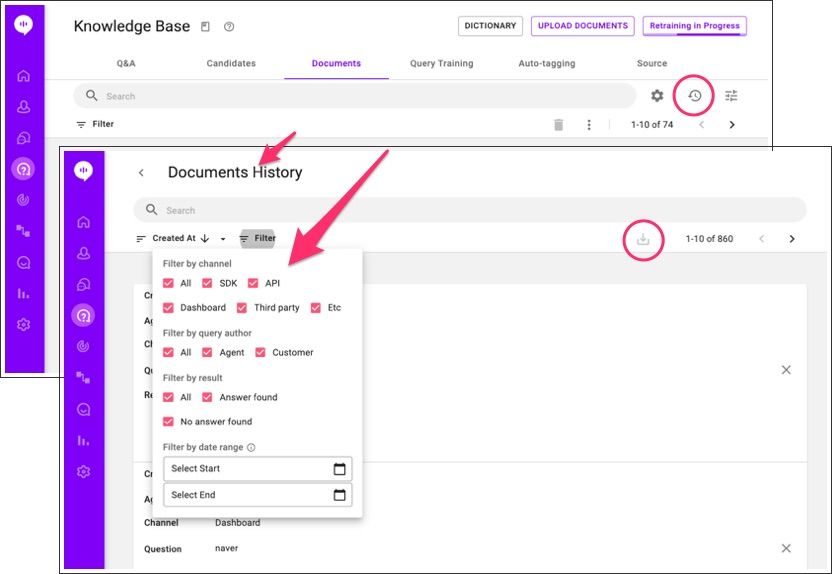
In the Documents history page, you can filter the result by channel, whether or not the author was an agent or customer, whether or not an answer was found, and date. You can download Documents history by clicking the download icon. You must set a maximum 90-day filter ranger before being able to download your history.
Auto-Generating Q&A (Beta)
For those familiar with our Q&A feature, you can automatically generate Q&A pairs from uploaded documents. This feature is still in beta so expect hiccups.
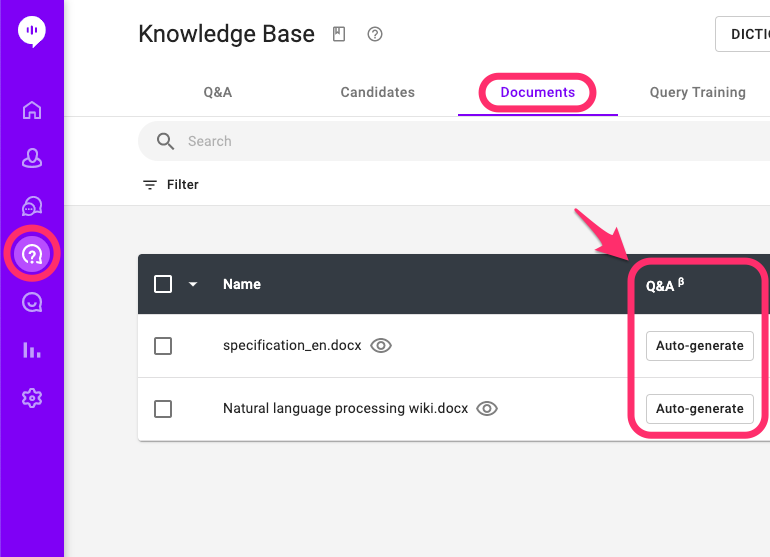
Simply click "Auto-generate" for the corresponding document and navigate to the "Candidates" tab once it finishes. Add the entries from there and you are done! See the following user guide for full details: Q&A Auto-Generation.