Alli User Guide - Skills Dashboard
Learn how to create and set up your Skills. #campaign #manual

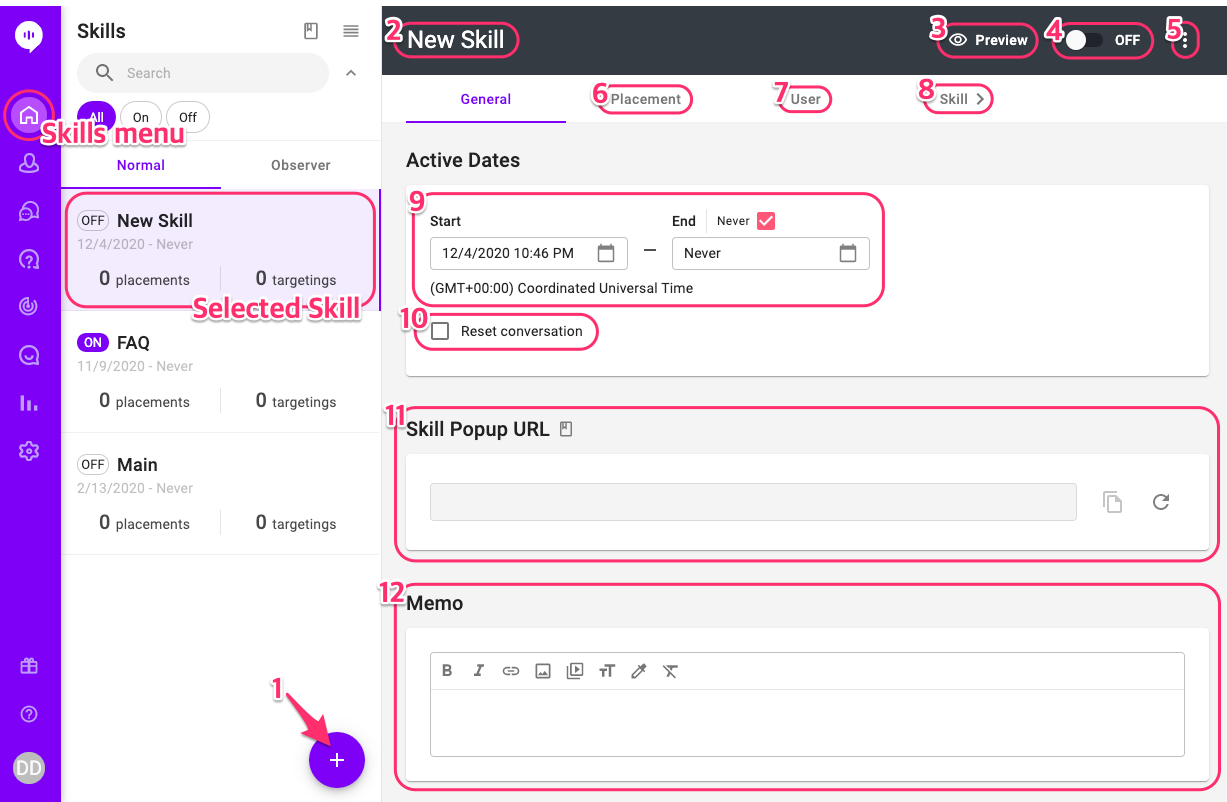
- New Skill: Click ‘+’ to create a new Skill.
- Skill name: Click to edit the Skill name.
- Preview: Once you’ve built your Skill, you can click ‘Preview’ to test.
- Status: ON/OFF - The Skill is only active online when it is turned ON. To edit, you must first turn OFF the Skill. The Skill is not accessible to your users when it is turned OFF.
- More: Clone or delete a Skill.
- Placement: Select to specify the placement to trigger the Skill. Placement is a place on your website or app, such as LANDING for the landing page. If no placement is specified, the Skill can be triggered by any pages of your website. We will leave this blank for testing.
- User: You can also specify the users to target, such as their profile, behaviors or other custom variables. For example, you can target users who have spent over $10,000.
- Skill editor: Click here to create a Skill flow. This is a required component for your bot to function.
- Schedule: The Start and End Date of the Skill. Your Start Date is set to the date you created the Skill and End Date is ‘Never’ unless you specify otherwise.
- Reset Conversations: ‘Reset conversation’ is enabled by default. When it is enabled, conversation will always start from the beginning of the Skill when users return; otherwise conversation will continue from where they left off in the Skill.
- Skill Popup URL: You can use this URL to load the skill anywhere without SDK integration. Please see this user guide for more details.
- Memo: You can leave a memo for your or your coworker's future reference about the Skill.
Learn More About Allganize's Technology