Alli User Guide - Settings > Variables (Updated)
Utilizing variables is extremely important to get 100% out of Alli. Variable is where you save any information that needs to be used later.
Utilizing variables is extremely important to get 100% out of Alli. Variable is where you save any information that needs to be used later. For example, you can save inputs from customers and use them to personalize the customer experience or to provide key information to your customer teams.
Menu Overview
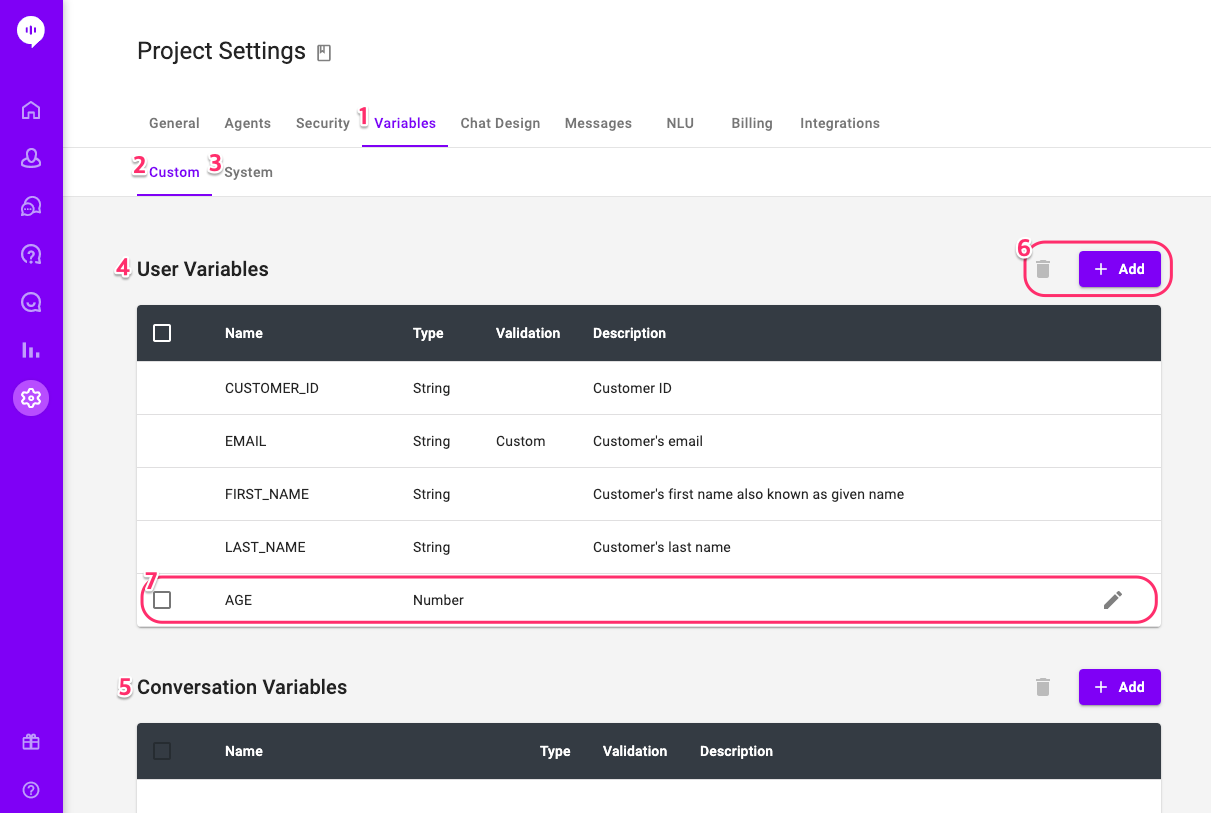
- The Variables menu is under Project Settings.
- Custom Variable tab - This is where you add/delete/edit your custom variables.
- System Variable tab - Variables used in the system (SDK variables) and specified by NLU API are listed here. You cannot edit this part from the dashboard.
- User Variables - The variables here are bound to each customer. Values are saved under the customer.
- Conversation Variables - The variables are used in the conversation and only remain saved until the conversation ends.
- You can delete selected variables or add a new one here.
- Summary of each variable. You can edit the variable using the pencil icon.
Adding Variables
There're preset variables in Alli but you need to create a lot of variables to suit your needs. There're three ways to add variables.
Option 1: Add from the Variables Setting menu
Click the ADD button under the Variables Setting menu (see #6 above). 'Create a new variable' will pop up.
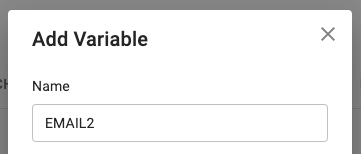
Put the variable's name here. Name can contain alphanumerical characters, underscore (_), hyphen (-), or period (.), and must start with an alphabet or underscore (_).
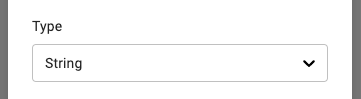
Select the variable type. Most types are self-explanatory but here are a few notes.
- Boolean type means the value is true or false.
- File type lets customers or the system to upload files.
- JSON, String List, JSON List are for advanced users only and need external JSON url to use.
- Check out these posts to find more details about File/JSON/String List/JSON List: List variables & File variable, Assign Variables to Variables
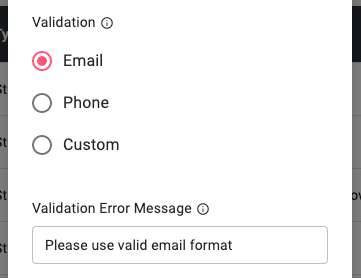
You'll only see this part if you select String type. See this post for more details about Validation: String Validation
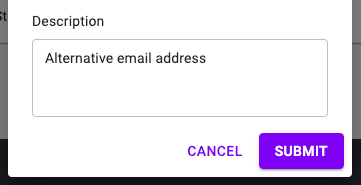
Put a brief description of the variable and submit. You just created a custom variable!
Option 2: Add from nodes in the skill editor
While editing a skill, you can find 'Create a new variable' in any dropdown you put variables.
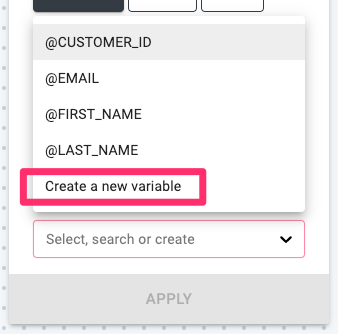
Click it and you'll see the same 'Add Variable' window from the Option 1 above.
Option 3: Add from @Variables menu in the skill editor
In the skill editor, click @Variables at the top right on the menu bar to open the Variables panel. Then click +Add button to start adding a variable.
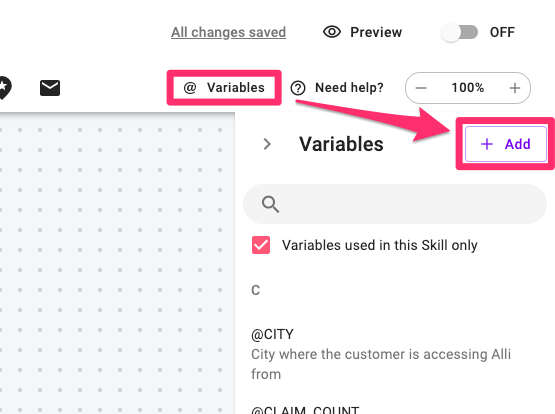
After that you'll see the same 'Add Variable' window from the Option 1 above.
More tips
- Some nodes only allow a set type of variables under specific conditions. If you don't see the variable you just created in the skill editor, check if you selected the right variable type.
- Variables being used in any skill cannot be deleted or edited, whether the skill is on or off. If you're not sure which skill is using which variables, click the @Variables in the skill editor (the same one from Option 3 above) to see the Variables panel.